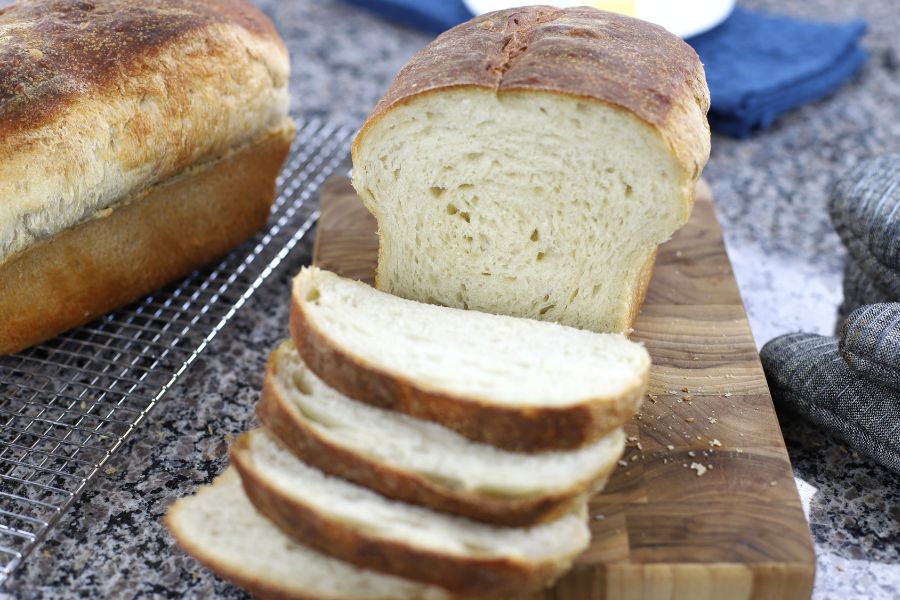
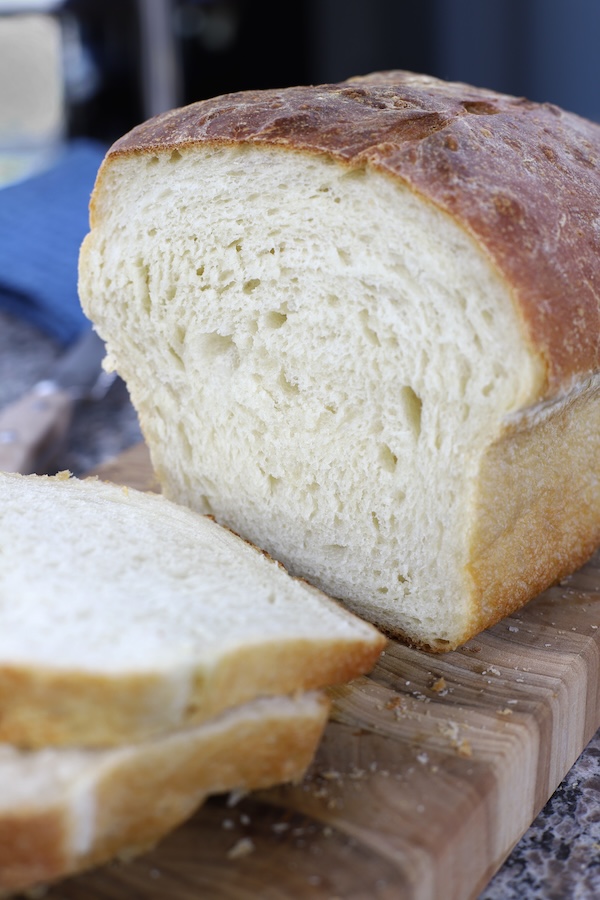
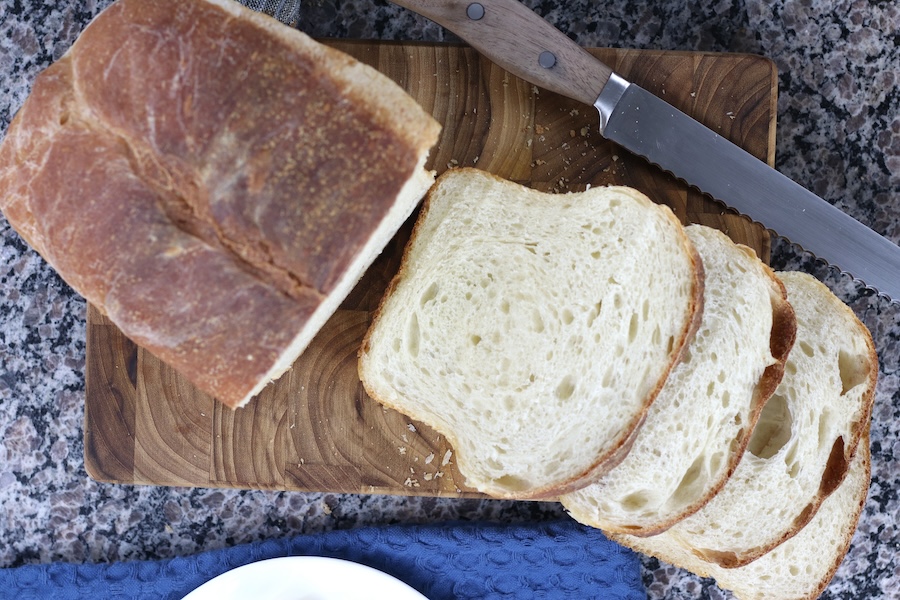
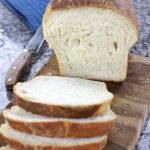
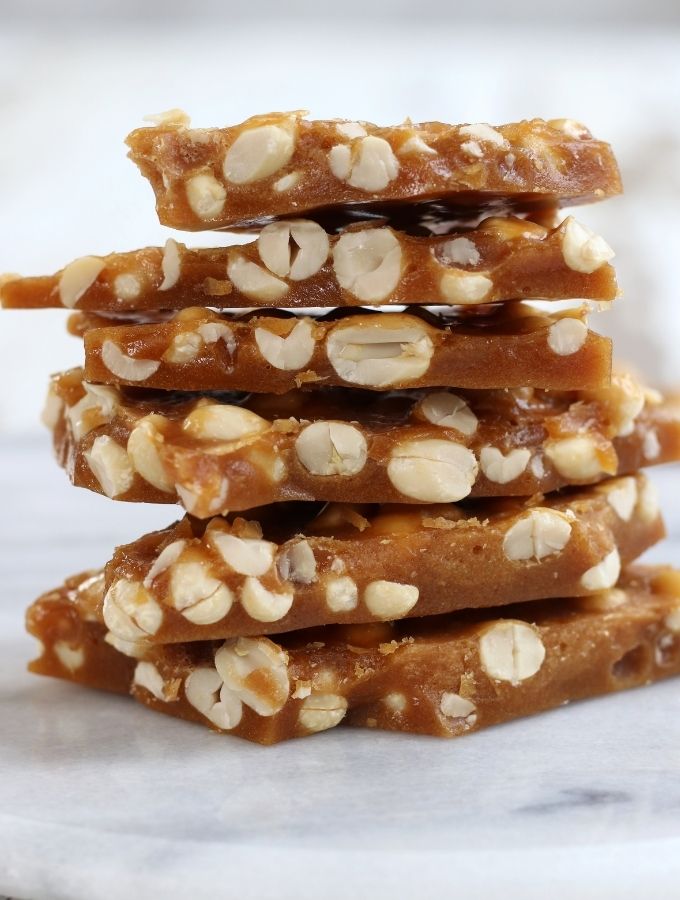
Soft Sourdough Bread
Soft Sourdough Bread is a beloved staple for many, but it can be overwhelming if you’re new to baking. Learn how to make soft and fluffy sourdough bread using all-purpose flour and Easy Sourdough Starter. This beginner-friendly recipe is perfect for those just starting out.

This post may contain affiliate links which I earn a small portion in sales if a purchase is made. Rest assured though, it is never at any additional cost to you.
Sourdough Bread for Beginners: Getting Started
Sourdough bread making is one of the most enjoyable and rewarding culinary activities. From the simple act of mixing the ingredients to the aroma that fills your kitchen as the bread bakes, many home chefs find satisfaction in the process. However, if you are new to sourdough baking it can feel overwhelming as to where to start. Below you will find the essential steps needed to get you on the road to making Soft Sourdough Bread.
- Create and Maintain Your Sourdough Starter– The secret to phenomenal sourdough bread really boils down to having a bubbly and thriving sourdough starter. My Easy Sourdough Starter recipe has helped thousands of new bakers create amazing homemade bread. Once you’ve created your starter, learn how to maintain its health and vibrancy with the guide on How To Maintain Sourdough Starter.
- Gather Ingredients and Tools– Fortunately, sourdough bread making doesn’t require a ton of ingredients or an excessive amount of tools. However, certain kitchen equipment, while seeming optional, significantly streamlines the process (refer to the ‘Tools Needed’ section below for further details).
- Practice the Basic Techniques– Understanding the fundamental techniques of sourdough baking helps in creating irresistible loaves of bread. Techniques such as mixing, stretch and fold, proofing and shaping contribute to the overall success of sourdough making. However, with practice and patience, these skills become much easier. The good news, many times you can create amazing loaves of bread with a thriving starter, even when your techniques are off a bit.
Sourdough Sandwich Bread vs Traditional Sourdough
This Soft Sourdough Bread is perfect for making sandwiches, paninis, toast, bread pudding and even a lighter, fluffier French Toast. On the other hand, traditional crusty sourdough, like Sourdough Baguettes, are wonderful paired with bread oil for dipping, used as a base for Bruschetta, or transformed into bread crumbs and croutons.
Mastering Soft Sourdough Bread: Essential Tips for New Bakers
If you’re new to sourdough baking, one of the first things you might notice is that sourdough has a higher hydration level compared to other types of bread. This can make new bakers feel like they’re doing something wrong. However, this is completely normal. The high hydration makes the dough seem sticky and difficult to handle at first, but with practice, you’ll get the hang of it and learn to work with it effectively.
In addition to adjusting to the higher hydration levels, below you’ll find tips for overcoming various challenges that many beginners face when starting with sourdough baking.
Sourdough Starter
Traditional homemade sourdough bread starts with a healthy and vibrant starter. One of the biggest challenges for new bakers is creating and maintaining this starter. My Easy Sourdough Starter recipe, along with the informational post on How to Maintain Sourdough Starter, has helped thousands of beginners successfully create and sustain their starters.
Mixing the Dough
Soft Sourdough Bread requires just a few more ingredients than traditional crusty sourdough. Because of this, the order in which the ingredients are mixed can be important. However, mistakes can happen and often your bread will still turn out amazing as long as your starter is healthy and vibrant.
- Start by combining the starter, sugar, and warm water (about 105℉ to 115℉ or 40℃ to 46℃) in a large bowl and mix together until the starter dissolves.
- Add in the flour and salt and mix it in with your hand or a wooden spoon.
- Once the flour is mostly incorporated, add the oil and mix until everything comes together into a rough, shaggy dough. Cover the bowl with plastic wrap and let the dough rest for approximately 30-45 minutes.
Stretch and Fold
The stretch and fold technique in sourdough baking is crucial for developing gluten, aerating the dough, building strength, ensuring even fermentation, and making handling wet dough easier. However, even with the stretch and fold technique, the dough can still be sticky. One helpful tip when performing the stretch and fold process is to keep your hands slightly damp to prevent the dough from sticking.
For the stretch and fold technique, gently pinch one side of the dough, stretch it upwards, and fold it over the rest of the dough. Rotate the dough and repeat until all sides have been folded. This cycle of resting and then stretching and folding is typically repeated four times before proofing (aka fermentation) begins.
Proofing the Dough
Proofing, also known as fermentation, can be done either at room temperature or in the refrigerator. The amount of time needed to proof your dough will mostly depend on temperature and how vital and active your starter is. It is important to keep in mind that there can be variations in how long it takes to proof from one batch of bread to the next. Additionally, there are two stages of proofing/fermentation when making sourdough bread.
- First Fermentation (Bulk Fermentation)– Bulk fermentation is the initial phase where the dough undergoes its primary fermentation. During this stage, the yeast in the sourdough starter metabolizes the sugars in the flour, producing carbon dioxide and organic acids. This first fermentation can last several hours, ranging from 4 to 12 hours depending on factors like dough temperature, starter activity, and desired flavor development.
- Second Fermentation (Final Proofing)– Final proofing, also known as the second rise or final fermentation, occurs after the dough has been shaped into its final form (such as a loaf or rolls). During this stage, the shaped dough undergoes a final rise before baking. This stage typically lasts 1 to 4 hours, depending on factors like dough temperature, starter activity, and desired dough volume increase. The final proofing is important because it allows the dough to undergo a final fermentation, further developing flavor and texture. It also gives the dough time to relax and expand, leading to a light and airy crumb.
Shaping the Dough
After the first fermentation, the dough will need to be shaped before the final proofing. At this stage, it will have noticeably increased in volume, becoming puffy, aerated, and bubbly compared to its initial state.
- Before shaping, remove the dough from its container and place on a lightly floured surface.
- Lightly pinch the dough’s edge, then stretch and fold into the center a few times to tighten up the dough, before evenly dividing it in half.
- Gently flatten the first half into a rectangle, then tightly roll the dough away from you, beginning with the edge closest to you, to form a cylinder.
- Place in the loaf pan with the seam side down and repeat with the second half. Note: Before the final proofing, cover the loaves with plastic wrap misted with cooking oil to keep the dough moist and prevent sticking.
Scoring the Dough
Scoring the dough for this soft sourdough bread before baking can be tricky because of its high hydration level. Although not imperative, scoring the dough allows for controlled expansion during baking, which promotes even rising, optimal crust development, and a visually appealing finished loaf. Here are a few tips that can help make scoring the dough easier.
- Chill the Dough– If the dough is too sticky to score, refrigerating it for a short period before baking and scoring(15-30 minutes) can help firm it up slightly, making it easier to handle and score.
- Use Flour or Oil– Lightly dusting the surface of the dough with flour or oil can help reduce stickiness, making it easier to handle and score. However, be mindful not to add too much flour, as it can affect the texture of the final loaf.
- Try a different Scoring Tool– Experiment with different scoring tools, such as a serrated knife or razor blade, to find one that works best for your dough consistency. Some tools may perform better than others depending on the dough’s hydration level and elasticity.
Common Misconceptions About Soft Sourdough Bread
- Only strong flour is suitable for sourdough. (Misconception #1)– It’s not uncommon for new bakers to believe that only strong, high-protein flour (like bread flour) can be used for sourdough. However, blending different flours, such as all-purpose flour or even whole grain flours, can yield delicious results. Experimenting with flour types can lead to varied textures and flavors.
- More kneading equals softer bread. (Misconception #2)– A common misconception among new bakers is that extensive kneading is necessary to achieve a soft bread texture. However, sourdough bread benefits more from allowing the dough to rest and using gentle stretch-and-fold techniques. This method gradually develops the gluten, resulting in a softer, airier bread without overworking the dough.
- Fermentation time doesn’t impact texture. (Misconception #3)– New bakers are often unaware of the importance of proper fermentation. Under-proofing can result in dense, hard bread, while over-proofing can lead to a collapsed structure. Keeping a watchful eye on the dough during fermentation is crucial for achieving desired results. Tip: When the dough has roughly doubled in size and has a slightly domed top, it is generally done with the first fermentation. For the final proofing, perform the “finger dent test”: gently press your finger into the dough. If the indentation springs back slowly and remains slightly visible, the dough is properly proofed and ready to bake. If it springs back quickly, it needs more time; if it doesn’t spring back at all or collapses, it may be over-proofed.
- Following exact timing for every step is critical. (Misconception #4)– For new bakers, sourdough baking can feel stressful, as it seems like exact timing is crucial. However, these timings are just guidelines. It’s more important to judge the dough’s readiness by its characteristics rather than by the clock. Factors such as room temperature, humidity, and flour type all affect fermentation and proofing times.
- Sourdough needs to be baked at a high temperature. (Misconception #5)– Baking at very high temperatures creates a thicker, crisper crust, typical of traditional crusty sourdough. For a softer crust, baking at a slightly lower temperature is often more effective.
Tools Needed
- Large Mixing Bowl or Proofing Container
- Kitchen Scale– Weighing the ingredients helps to ensure consistent and reliable results.
- Flat Surface or Large Cutting Board
- Dough Whisk (optional)-
- Bench Scraper
- Dough Scraper
- Share Knife or Lame
- Loaf Pans
- Plastic Wrap
- Cooking Spray
Ingredients Needed
- Sourdough Starter– The sourdough starter is what makes the bread rise naturally. It’s made up of wild yeast and bacteria. The yeast helps the dough rise by producing gas, while the bacteria add a tangy flavor and improves the dough’s texture.
- Sugar or Honey– Sugar in soft sourdough bread does a few things. It feeds the yeast to help the bread rise better. Sugar also helps the crust brown and adds sweetness.
- Warm Water (about 105℉ to 115℉ or 40℃ to 46℃)– Warm water hydrates the flour and activates the yeast. Warmer water speeds up fermentation, while cooler water slows it down. Also, proper hydration helps develop gluten, giving the bread its structure and chewy texture.
- All-Purpose Flour– All-purpose flour is the main ingredient that gives the bread its shape and size. It has proteins that turn into gluten when mixed with water and kneaded. Gluten traps air bubbles, which helps the bread rise and gives it structure. All-purpose flour has the right amount of protein to make soft, tender sourdough bread. Bread flour, which has more protein, can also be used for a chewier texture. As you become more and more comfortable with this recipe, feel free to experiment with other flours such as whole wheat and rye.
- Salt– salt enhances the flavor and controls how fast the yeast works, so the dough doesn’t rise too quickly. It also makes the gluten stronger, which helps the dough be stretchy and hold its shape. Plus, salt helps keep the bread fresh by preventing the growth of unwanted bacteria.
- Oil– Oil is what gives the bread its soft and tender crumb by coating the flour particles and slightly weakening the gluten development. Additionally, oil helps the bread stay fresh longer by slowing down the staling process and it adds a rich and delicious flavor. I personally enjoy using extra virgin olive or avocado oil.
Best Flour for Bakery-Quality Sourdough
The right flour makes all the difference in achieving soft, flavorful sourdough with a perfect rise. Buying directly from King Arthur Flour guarantees freshness, expert-tested quality, and consistent performance. Their flours are milled for optimal texture, giving your bread that bakery-quality chew and structure. Skip the third-party markups and get the best straight from the source! (affiliate)
How To Make Soft Sourdough Bread (condensed Instructions)
Mixing the Dough
- Combine sourdough starter, sugar, and warm water in a large bowl until the starter dissolves.
- Add flour and salt, mix with your hand or a spoon.
- Add oil, mix into a rough dough. Cover with oiled plastic wrap and rest for 45 minutes.
Stretch and Fold
- Stretch and fold dough for 1 minute. Cover and rest for 30 minutes.
- Repeat stretch and fold three more times.
Bulk Fermentation
- Let dough rest for approximately 4 hours at room temperature or 12 hours in the refrigerator.
Shaping the Dough
- Remove refrigerated dough and let it come to room temperature.
- Grease two loaf pans.
- Turn dough onto floured surface, divide in half.
- Flatten and roll each half into a cylinder, place in loaf pans. Cover and proof for 1-4 hours.
Baking the Loaves
- Preheat oven to 375℉ for at least 30 minutes before baking.
- Score loaves and bake for 35-40 minutes until golden brown.
- Cool in pans for 10 minutes, then transfer to wire rack to cool completely.
Storage and Freezing Instructions
Room Temperature Storage
There are several options for storing soft sourdough bread at room temperature. You can wrap it in plastic wrap, place it in reusable bread bags, or store it in bread storage containers. Whichever method you choose, this recipe will stay fresh for 2-3 days when stored properly.
Freezing Instructions
If you want to store the bread for a longer period, freezing is a great option. To freeze soft sourdough bread, wrap it tightly in plastic wrap and then place it in a resealable freezer bag or an airtight container. Label the container with the date to keep track of freshness. Frozen sourdough bread can last for up to 2-3 months.
When ready to enjoy, thaw the loaf at room temperature for several hours or overnight. For a quicker option, individual frozen slices can be toasted to desired doneness.
Top Tips for Soft Sourdough Bread
- Much of the success of sourdough comes down to a vibrant and healthy sourdough starter. You’ll know your starter is ready when there are abundant bubbles and a noticeable rise. Depending on how often you use your starter, it may take 3-4 days of feeding before it is ready to make bread.
- Doing the bulk fermentation in the refrigerator can help the bread develop amazing flavor. When taking this approach, make sure to pull the dough from the refrigerator and allow to come to room temperature before shaping and proceeding with the second fermentation. This step ensures easier handling of the dough and ultimately leads to superior results.
- Make sure to preheat your oven for at least 30 minutes before baking. Doing this helps in achieving the best oven spring, as it guarantees the bread dough starts baking at the right temperature. The abrupt surge of heat from the preheated oven prompts swift expansion of the dough, resulting in enhanced volume and a fluffier texture in the final loaf.
- It is important to keep in mind that baking sourdough from-scratch is a lengthy process. It can take up to 3-4 days to get your developed starter ready for making bread and the act of making soft sourdough bread can take 2 days. With this in mind, it is best to plan in advance.
Frequently Asked Questions
What makes sourdough bread softer?
The key ingredients that help to make soft sourdough are sugar and oil. Sugar not only feeds the yeast, promoting better fermentation, but also helps retain moisture, resulting in a tender crumb. Oil adds fat, which tenderizes the dough and keeps the bread soft for longer. These ingredients work together to create a softer, more tender sourdough bread.
How do I choose the best flour for making soft sourdough bread?
Opt for all-purpose flour or a blend of all-purpose and bread flour. All-purpose flour has a moderate protein content, which provides a good balance between structure and softness. If you want a slightly sturdier texture without compromising softness, mix in some bread flour. Avoid using 100% whole grain flours, as they can make the bread denser and less tender. Instead, incorporate whole grain flours partially to maintain the desired texture.
Can I use just bread flour to make soft sourdough bread?
Yes, you can use all bread flour to make soft sourdough bread, but you’ll need to make a few adjustments to ensure the bread remains tender. Bread flour has a higher protein content, which can lead to a chewier texture. To maintain softness, increase the hydration by adding 25-50 grams more water to the dough.
What is the best proofing method for soft sourdough bread?
For soft sourdough bread, the ideal proofing method combines bulk fermentation, whether at room temperature or in the refrigerator, followed by a final proof at room temperature.
How do I maintain the right sourdough starter for soft bread?
I highly recommend using both my Easy Sourdough Starter recipe and the instructional post on How To Maintain Sourdough Starter. Together, they simplify the essentials for maintaining a healthy and vibrant starter, making it easy for new sourdough bakers to succeed.
Is the stretch and fold necessary part of making sourdough?
The stretch and fold process is very beneficial when making sourdough bread. It helps develop gluten for a lighter texture, promotes even fermentation, and strengthens the dough for easier handling. While other methods exist, incorporating stretch and fold enhances the final loaf’s quality.
What does over-proofed sourdough look like?
During bulk fermentation, over-proofed sourdough tends to spread out excessively in the bowl or proofing container, losing its initial volume and shape. In the final proofing stage, it may collapse or flatten when gently touched, lacking the resilience and springiness of properly proofed dough.
Does steam need to be present to help create soft sourdough?
Steam’s role in soft sourdough bread depends on your desired outcome. While steam aids crust development in traditional baking, it’s not always necessary for softness. Soft sourdough relies more on ingredients like sugar and oil for tenderness. However, some bakers still use steam to maintain oven moisture, enhancing a softer crust. Use steam based on your personal preference and desired bread characteristics.
Soft Sourdough Bread
Ingredients
- 300 grams Easy Sourdough Starter *bubbly and active
- 50 grams sugar *or honey, *see Note #1 below
- 650 grams warm water *105°F to 115°F (40°C to 46°C)
- 1000 grams all purpose flour *unbleached
- 25 grams salt
- 40 grams oil *I use either avocado or extra virgin olive oil
Instructions
Mixing the Dough
- Weigh and combine the sourdough starter, sugar and warm water in a large bowl. Mix together until the starter dissolves.Note: Remember to tare your scale before weighing your ingredients.
- Add in the flour and salt and mix it in with your hand or a wooden spoon.
- Once the flour is mostly incorporated, add the oil and mix until everything comes together into a rough, shaggy dough. Cover the bowl with an oiled piece of plastic wrap and let the dough rest at room temperature for approximately 45 minutes.
Stretch and Fold
- After resting, gently pinch one side of the dough, stretch it upwards and then fold it onto the center of the bowl. Repeat this process for approximately 1 minute, working around the perimeter of the bowl. Cover the bowl and let the dough rest for another 30 minutes.
- Repeat this process of stretching, folding and resting a total of 4 times.
Bulk Fermentation (First Fermentation)
- Once the final stretch and fold is completed, let the dough rest either at room temperature or in the refrigerator to complete the first fermentation. It will take approximately 4 hours at room temperature or 12 hours in refrigeration to proof. See Note #2 below.
Shaping the Dough
- Note: When fermenting the dough in the refrigerator, be sure to remove it and let it come to room temperature before shaping. This step ensures easier handling of the dough and ultimately leads to superior results.
- Grease two standard size loaf pans (approximately 8.5 x 4.5-inch or a 9 x 5-inch pans) and set aside.
- Turn the proofed dough onto a lightly floured flat surface.
- Gently pinch the edge of the dough, then pull and fold it into the center a few times to firm up the dough before evenly dividing it in half.
- Carefully flatten the first half into a rectangle shape. Starting with the edge closest to you, roll the dough tightly away from you, creating a cylinder.
- Place the prepared dough into a greased loaf pan with the seam side down. Repeat with the second half of the dough. Cover with oiled plastic wrap and let proof (second fermentation) at room temperature for approximately 1-4 hours. See Note #3 below.
Baking the Loaves
- Within the last half hour of the second and final rise, preheat the oven to 375℉. See Note #4 below.
- Once the loaves have fully risen, remove the plastic wrap and score the tops by making a slash along the length of the loaves with a sharp knife or lame. See Note #5 below.
- Bake the loaves in the preheated oven for 35-40 minutes, or until they are golden brown and sound hollow when tapped on the top.
- Remove the loaves from the oven and let them cool in the pans for 10 minutes before transferring them to a wire rack to cool completely. Note: Do not store until the loaves are completely cool.
Video
Notes
- Use a very sharp knife, lame or razor blade. This will help to create clean cuts.
- Hold the blade at a shallow angle (about 30-45 degrees) to the surface of the dough. This helps the cuts open up properly during baking.
- Make confident, swift cuts across the surface of the dough. Avoid hesitating or sawing motions, as this can drag the dough and lead to irregular cuts.


Excellent recipe! I broke the 2-loaf recipe into 3 and they were perfect!
That is wonderful to hear! Thank you so much Julie for the tip and taking the time to make the recipe. I appreciate you!
I am making your recipe and this is my first sourdough bread! Sadly I read your comment about adding extra water if using bread flour…too late. I will see what happens.
My question is can I let this do its last fermentation in the fridge for 18 hours? This timing thing is very interesting! thank you
Hi JoAnn! I’m so excited you’re making your first sourdough bread and with this recipe! Don’t worry too much about the bread flour this time around. It should still turn out well. You know for next time if the dough feels a bit tight.
Yes, you can do the final fermentation in the fridge for up to 18 hours. Just keep in mind that the dough will need to come all the way back to room temperature before baking, which adds extra time. The same goes if you choose to do the bulk fermentation in the fridge. It slows everything down, so you’ll want to plan for that warm-up period.
That said, this longer, cooler fermentation will give you a deeper, more developed sourdough flavor (still milder than store-bought, but noticeably more tangy than a same-day bake). The timing can feel a little tricky at first, but once you’ve done it a couple times, it starts to fall into place. Please keep me updated on ho everything goes. Happy baking!
can you break this recipe down to cups and teaspoons for me please! I would so appreciate it. thanks so much!
Judy
Hi Judy! I completely understand wanting cup and teaspoon measurements since they can feel much easier. However, I highly recommend sticking with the weights listed for the best results. Weight measurements ensure consistent, reliable loaves every time, while cup measurements can lead to unpredictable results. I hope you’ll give it a try as written, and I am here for any questions along the way!
Hi hi. Will anything change if I use brown bread flour.
Hi Karen! Great question. Just to clarify, if by “brown bread flour” you mean a blend that includes some whole wheat, then yes, the texture may be a little denser and it might absorb a bit more water than white bread flour. You can absolutely use it, just know the loaf will likely be slightly less soft and a bit more rustic in flavor all depending on how much whole wheat is used. I hope this helps.
Hey! Can you do a longer first bulk ferment on this? Say 24-48 hours??
Hi Heather! Yes, you can do a longer first bulk ferment in the refrigerator for 24–48 hours. Just make sure to let the dough come to room temperature before shaping the loaves. I hope you enjoy and happy baking!
So I have now made this about 8 times….its is my go to!! Turns out fabulous everytime.
When I tell my hubby that it is bread day…his face lights up!!! That first piece with warm butter….need I say more. Thank you so much for sharing and for all of your fabulous tips!!!
Hi JoAnn! This absolutely makes my day to hear! I love that this recipe has become your go-to and that your husband looks forward to bread day. There really is nothing better than that first slice with warm butter. Thank you so much for sharing this with me!
This recipe and video were so helpful. I never thought I could make sourdough but with your instructions I have made multiple batches of gorgeous sandwich bread. It still blows me away. Thank you so much for taking something that felt so intimidating and making it so simple.
Hi Melissa! I’m so happy to hear this! I love that the recipe and video made sourdough feel simple. Thank you so much for sharing this. It means so much!
My third use of this recipe. With a few very minor changes for my tastes and environment, I know have an excellent bread product. I use this recipe for a sandwich loaf, rustic loaf and even dinner rolls. As with most things it takes practice and making a recipe your own. Thanks for your wonderfully detailed information.
Hi Lawrence! Thank you so much! I love hearing that you’ve been able to adapt the recipe for different styles of bread. I agree, it takes a minute to make a recipe your own and it sounds like you’ve really done that beautifully. Thank you so much for taking the time to make this bread and coming back to comment. Happy baking!
I’m new to sourdough and very excited to try this bread. My AP flour is bleached, will that make a difference in this recipe?
Hi Kimberly! That’s a great question! Bleached flour will work for baking this bread, but it’s not ideal for maintaining or feeding a sourdough starter. The bleaching process removes some of the natural nutrients and can slow down fermentation quite a bit since the wild yeast and bacteria have less to feed on.
If your starter is already active and bubbly, you can still bake with bleached flour for this loaf. But for feeding your starter, I definitely recommend switching to unbleached all-purpose or whole wheat flour. It’ll help keep it lively and strong.
Hope that helps and happy baking!
Hello, I’m new to sourdough & have been struggling for the last month trying to get my bread softer. I’m wanting to try your recipe, but I don’t want to add the sugar. Can the sugar be left out? I’m trying to stay away from adding extra sugar to my foods. Thank you! Joan
Hi Joan,
Great question and you’re absolutely not alone in wanting a softer sourdough without added sugar. The good news is that the sugar in this recipe isn’t there for sweetness. It acts more like a dough conditioner: it helps with softness, moisture retention, and a beautifully tender crumb.
That said, you can leave it out if you prefer. Just know that the loaf may turn out slightly less soft and may stale a little faster, but it will still rise well and have great flavor. If you’re aiming for softness without sugar, here are a few tips that help tremendously:
1) Make sure your starter is very active. A lively starter produces a lighter, softer crumb.
2) Let the dough ferment fully. Under-fermentation is one of the biggest culprits behind dense or tough sourdough.
3) Don’t skimp on hydration. Increasing to 700 grams of water will give you a softer, more supple crumb but the dough will be a little more challenging to work with.
4) Since oil contributes to a soft crumb, you can increase it by 5–10 grams if you want a little extra softness without sugar.
I hope this helps and if you ever want help troubleshooting, I’m here!
I messed up! I missed the add oil step. I didn’t realize it until I did the last stretch & fold. I added it and mixed it as well as I could. Letting it sit on the counter now. I hope I don’t have to toss it!
Hi Tracy! I can understand the worry but you should be totally fine.
Adding the oil late won’t ruin the dough; it just means the gluten was already partially developed before the fat went in. Oil tends to “shorten” gluten strands slightly, so adding it earlier helps everything incorporate more smoothly. When it’s added after the last stretch and fold, it may take just a few more but the dough will still rise, still bake and still taste delicious.
The only difference you may notice is a slightly more open crumb or a touch less with uniform texture, but soft sourdough is incredibly forgiving.
Let it finish its bulk rise, shape as normal, and bake as written. Most people will never know anything happened. Please don’t hesitate to reach out if you have any questions and happy baking!
Best, softest, most delicious sourdough sandwich bread I’ve come across… and I’ve done a LOT.
Kaley you made my day!!! Thank you so much for taking the time to make this bread and coming back to comment and rate it. It is one of my favorites. My husband and I moved over the holidays and I made sure to make extra and freeze for easy meals. Thank you so much for being here!!
Wow! This is a fantastic recipe. The instructions are clear and concise and easy to follow. I was a little bit worried because my dough seemed very wet, but the resulting bread is amazing! It has so much sourdough flavor, but it’s perfectly moist,soft and easy to slice. I’m quite sure this is going to become my go to sourdough bread recipe. Thank you so much for sharing.
I can’t even begin to tell you how happy this makes me. Thank you so much for trusting the recipe and for taking the time to come back to rate and comment. I very appreciate it!!! Happy Baking!
My dough is very sticky & wet. Going to see if a little more flour helps after if finishes bulk fermenting. I’ve made a lot if sourdough. Although I don’t use AP flour very often. Initially use bread flour. I followed the recipe and weighed all the ingredients. Not sure where the disconnect is
Hi Patti! Thank you so much for giving this bread recipe a try. Sourdough dough is naturally sticky because of its high hydration, which can feel a bit different, especially if you’re used to lower-hydration recipes or working with bread flour. That stickiness at the dough stage is totally normal! If it makes handling tricky, a small sprinkle of extra flour can help.
If you have any other questions, I’m always happy to help and I’d love to hear how your loaf turns out in the end. Happy baking!
Wow wow wow. Favorite loaf yet, thank you! I just had to melt butter on top while still warm. How well will this freeze? If I don’t, I will eat the whole thing!!
Oh Cindy this makes me so happy to hear!!! Yes, I also do the 2 loaves (sometimes I’ll make 4), let them cool completely, slice and then freeze. It makes for very easy sandwiches with just a light toasting. If I didn’t freeze them, I would eat the whole loaf by myself also. I really appreciate you taking the time to make the bread and especially coming back to comment and rate it. Thank you!!!