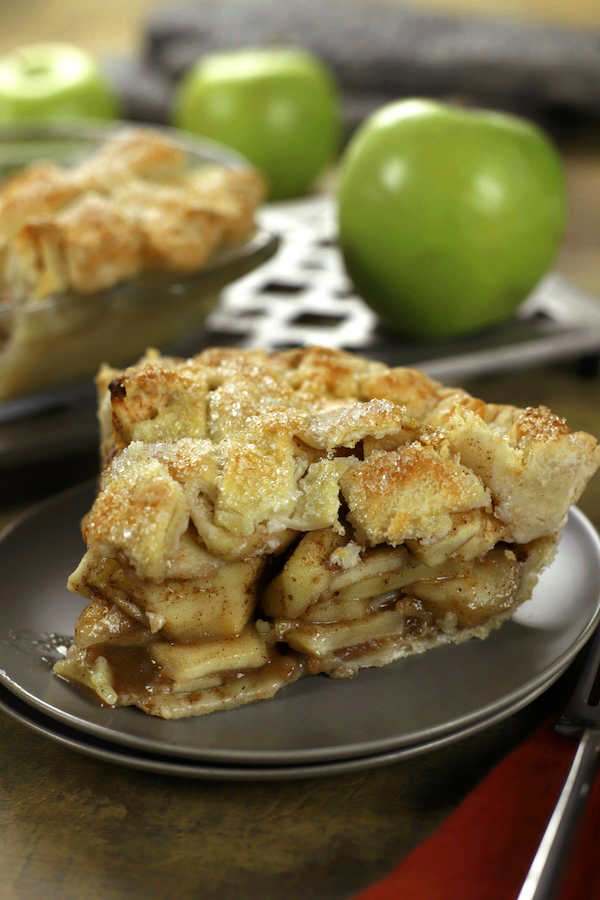
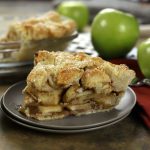
Homemade Apple Pie
Homemade Apple Pie has a perfectly buttery, flaky crust, tender apples, and warm fall spices. With this straightforward approach, you’ll feel like a gourmet pastry chef, even if you’re just starting out. This classic dessert is perfect for holidays, summer BBQs, or any special occasion for apple lovers.
This post may contain affiliate links, meaning I earn a small commission if you make a purchase—at no extra cost to you. Additionally, AI was used to assist with spelling, grammar, sentence clarity, and creative brainstorming.
What’s the Trick to a Great Apple Pie
To make a great apple pie, focus on these three essential elements: a flaky crust, a balanced flavor profile, and apples cooked to just the right tenderness. Below, you will find all the tips and tricks for creating a luxurious homemade crust that’s buttery, flaky, and surprisingly easy to make. The recipe post also includes flavor adjustments for the apple filling and expert tips to ensure your pie bakes beautifully, every time.
Best Apples for Apple Pie
The type of apple you choose greatly influences your pie’s flavor. Granny Smith apples are a top pick for their tartness and firmness, which balances the sweetness of your filling. You can use them alone or blend them with other varieties like Honeycrisp and Braeburn. Honeycrisp adds natural sweetness and a juicy texture, while Braeburn offers a hint of honey-like richness. For a well-rounded pie, use 1.5 pounds of Granny Smith apples and mix in the remaining 1.5 pounds with a combination of Honeycrisp and Braeburn. That said, many bakers prefer using just Granny Smith for its classic taste.
Tools Needed
- Rolling Pin– This French rolling pin has a beautiful design and is much easier to work with compared to a traditional rolling pin. It’s essential for rolling out pie dough, but more importantly, it’s the key to creating those thin sheets of butter that make the crust irresistibly tender and flaky.
- Bench Scraper– This tool is key for gathering those messy pie dough crumbs, helping to bring them together without having to touch the dough. By keeping your hands off, it also prevents the warmth from affecting the butter’s temperature, ensuring a perfectly flaky crust.
- Deep Dish Pie Pan– A 9-10 inch deep dish pie pan works perfectly for this recipe. Note: I used a 9 1/2 inch pan.
- Vegetable Peeler– OXO Good Grips Swivel Vegetable Peeler is my favorite all purpose veggie peeler perfect for peeling the apples.
- Large Bowl– Any large bowl can be used for mixing the apple mixture. However, if you really want to get into the spirit of baking, this old fashioned crockery bowl is always fun.
- Knifes– This set offers great quality at an affordable price, including a paring knife for coring apples and a larger knife for slicing them.
- Measuring Spoons and Cups– These stainless steel measuring spoons and cups will not only last forever, but the squared shaped spoons are designed specifically to reach into small spice jars with ease.
- Cutting Board– Last but not least, you will need a cutting board for preparing the apples.
Ingredients Needed
Crust Ingredients
- All Purpose Flour– All-purpose flour is the backbone of your pie crust, providing the structure needed to hold everything together. The gluten in the flour, when combined with water, forms a network that gives your crust its strength and elasticity. But be cautious to work the dough just until it comes together, as overworking it can cause too much gluten to develop, leading to a tough and less tender crust.
- Grass-Fed Butter– Although regular butter may be used, grass-fed butter is your secret weapon for a tender, flaky and incredibly tasty crust. Additionally, grass-fed butter is much easier to work with when chilled compared to traditional butter.
- Salt– Salt may seem like a small addition, but it’s crucial as it enhances the flavor of the butter and flour.
- Sugar– Sugar adds a hint of sweetness to your crust, which can complement the filling beautifully. It also plays a role in the browning process, helping your crust achieve that golden, appealing color. In addition, sugar slightly tenderizes the dough by interfering with gluten formation.
- Ice water– Ice water brings the dough together. It hydrates the flour just enough to create a cohesive dough without making it sticky. The key here is the temperature—ice-cold water ensures the butter stays in solid layers rather than melting into the flour, which is crucial for a flaky texture. The cold water also keeps gluten development in check, helping maintain a tender, delicate crust.
Filling Ingredients
- Granny Smith Apples– These tart apples are perfect for pie because they hold their shape well and balance the sweetness of the sugars. However, a mixture of Braeburn, Honeycrisp and Granny Smith apples may be used to add depth and complexity, offering a range of flavors and textures in every bite.
- Granulated Sugar– This adds a base level of sweetness to your filling, making the apples even more delicious.
- Brown Sugar– Brown sugar deepens the flavor with its rich, molasses notes and helps create a nice, caramelized texture. Either light or dark brown sugar may be used depending on on how intense you want the molasses flavor and color to be in your filling.
- All Purpose Flour– Flour thickens the filling as it bakes, creating a luscious, well-set consistency.
- Cornstarch– Cornstarch boosts the thickening power of the flour, ensuring your filling isn’t too runny while also adding a glossy, smooth texture.
- Lemon Juice– A splash of lemon juice brightens the flavor and helps balance the sweetness while keeping the apples from browning.
- Cinnamon– Cinnamon adds that classic warm, cozy spice that makes apple pie so comforting.
- Nutmeg– Nutmeg introduces a subtle, nutty depth of flavor that enhances the overall spice mix.
- Allspice– Allspice adds a unique flavor that complements cloves and cinnamon, giving your pie a richer, more complex spice profile.
- Cloves– Cloves offer a warm, aromatic kick that complements the other spices and rounds out the filling.
- Butter– Butter enriches the filling with a creamy, slightly indulgent texture and adds a touch of richness.
Topping Ingredients
- Egg Wash– Egg wash gives your pie topping a glossy, golden-brown finish. It helps the crust achieve that beautiful, bakery-worthy shine and creates a crisp, inviting texture.
- Sparkling Sugar– Sparkling sugar adds a delightful crunch and a touch of sparkle to your pie’s crust. It enhances the visual appeal and provides a sweet, crisp bite that makes every slice extra special.
Baking with Grass-Fed Butter
Grass-fed butter isn’t just a luxury, it is a game-changer when making pie crust. Here are a few reasons why you will want to make it your go-to butter choice this holiday season.
- Easier to Handle– Chilled grass-fed butter is a dream to work with compared to traditional butter. It rolls out smoothly and evenly, helping you achieve that flawless, consistent dough every time.
- Health Benefits– Grass-fed butter is richer in omega-3 fatty acids and vitamin K2, offering nutritional perks that support overall health. It’s a win for both flavor and wellness.
- Enhanced Flavor– The natural diet of grass-fed cows brings a rich, more complex flavor to the butter. This depth of taste can boost your baked goods to a whole new level of deliciousness.
Pro Tip– Use very cold butter and minimize handling it with your hands. Cold butter helps achieve a flakier texture, and less handling prevents the dough from becoming too warm, ensuring better results.
Apple Pie Filling Variations
- Apples– When choosing the apples, consider using a mix of Granny Smith, Honeycrisp, and Braeburn. Combining these varieties can balance tartness with sweetness and enhance the overall flavor and texture of your filling.
- Spices– This recipe includes a blend of cinnamon, nutmeg, allspice, and cloves, creating a pie that’s wonderfully warm, aromatic, and richly spiced. For those who prefer a milder flavor, you can use just cinnamon. Feel free to adjust the amount of any spice to intensify the flavor according to your taste preferences.
- Add-Ins– Don’t hesitate to experiment with extras like a handful of raisins, a sprinkle of chopped nuts, or a touch of vanilla bean paste. These additions can add delightful complexity and enhance the overall flavor of your pie.
3 Top Secrets to a Flaky Crust
- Create Sheets of Butter– To achieve a flaky crust, begin by incorporating large chunks of cold butter into the flour mixture. Flatten these chunks with a rolling pin to create thin sheets of butter. This technique keeps the butter in distinct layers, which will melt during baking and create a beautifully flaky texture.
- Keep It Cold– Always use cold butter and ice water. The cold temperature helps to prevent the butter from melting too soon, which is crucial for a flaky texture.
- Minimal Handling– Work the flour and butter mixture just until it starts to come together. Avoid overmixing, and handle the dough as little as possible. Excessive touching or kneading can warm up the butter, making it less effective in creating a flaky crust. The key is to keep the butter in visible chunks, which will melt and create layers during baking.
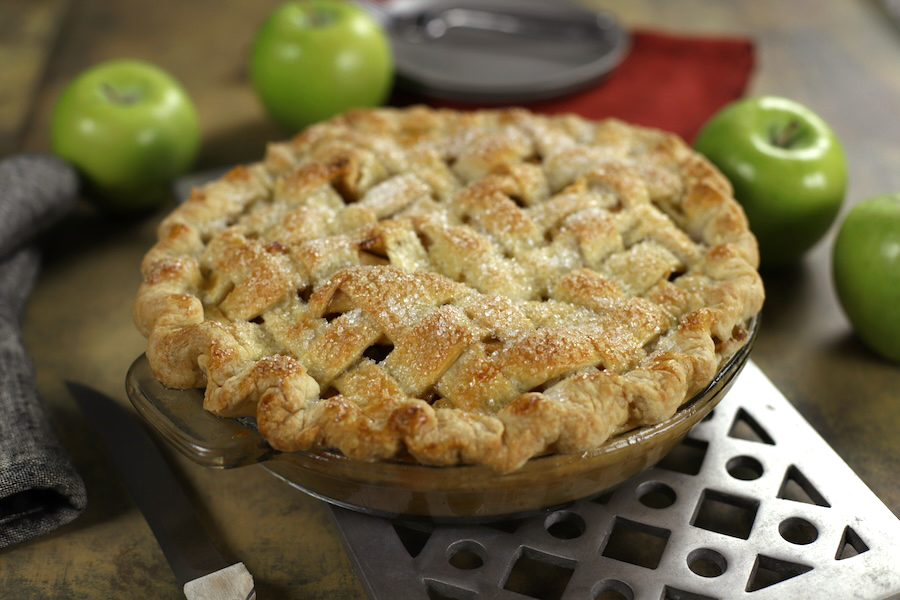
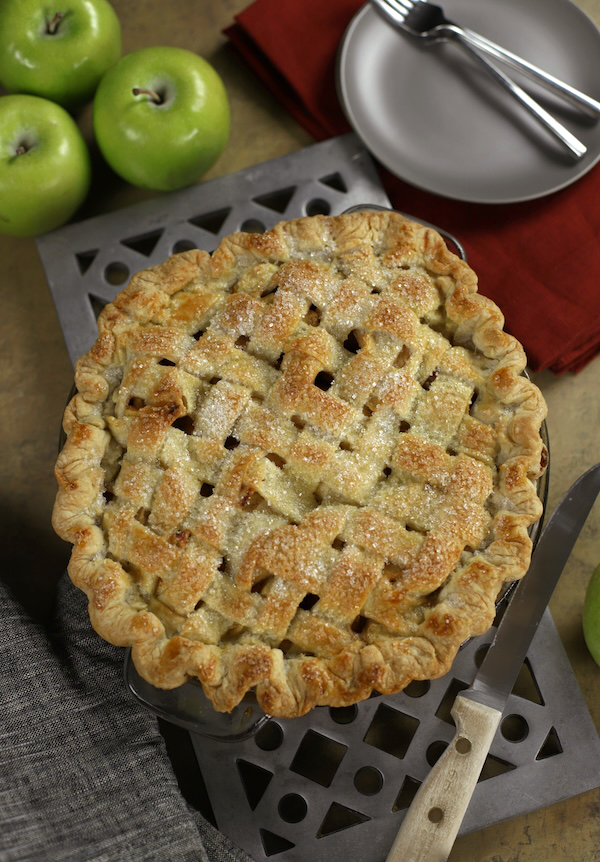
Lattice Crust vs Traditional Solid Top: Which One is Right for You
If apple pie is on your Thanksgiving menu, you might be deciding between a lattice or solid top. A lattice top, while requiring more effort, adds a stunning, textured look that will make you feel accomplished and proud. A solid top, on the other hand, is equally delicious but simpler to prepare. No matter which you choose, here are tips and best practices for each option to ensure your pie turns out perfectly.
Tips for Mastering a Lattice Crust
- Prepare Your Strips– Roll out your dough and cut 14-16 strips. Use a pizza cutter for clean, even strips.
- Lay the First Set of Strips– Place the strips going in one direction on top of your pie, evenly spaced and parallel.
- Weave the Second Set of Strips– To weave, lift every other strip of dough and place a new strip perpendicular to them. Gently lay the lifted strips back over the new strip, alternating as you go to create a crisscross pattern.
- Seal the Edges– Trim any excess dough and fold the edges inward to create a clean border. For crimping, use two fingers of your left hand and one finger of your right hand to press and pinch the dough together, sealing the lattice strips to the pie crust. This technique helps prevent the filling from spilling out during baking.
- Add a Glaze– Brush the lattice with an egg wash and sprinkle with sugar before baking to enhance color and texture.
- Loosely Cover with Aluminum Foil– To ensure the apples cook thoroughly without over browning the crust, loosely cover the pie with aluminum foil for the first part of baking. After 35-45 minutes, remove the foil and continue baking uncovered for an additional 20-30 minutes, or until the crust is golden brown and the filling is bubbly.
How To Do a Solid Top
- Roll Out the Dough– Roll out your pie dough to a thickness of about 1/8 inch. This will ensure a sturdy, yet tender, crust that covers the entire pie.
- Place the Dough on the Pie– Gently lay the rolled-out dough over the filled pie. For an easier transfer, roll the dough onto the rolling pin and unroll it over the pie. Trim any excess dough around the edges, leaving enough to crimp.
- Seal and Crimp the Edges– Fold the excess dough inward to create a clean edge. Use two fingers on your left hand and one finger on your right hand to press and pinch the dough together, sealing the edges firmly.
- Cut Vent Holes– Create a few small slits or shapes in the center of the top crust to allow steam to escape. This helps prevent the filling from bubbling over.
- Add a Glaze– Brush the top crust with an egg wash and sprinkle with sugar for a golden, crispy finish.
- Cover and Bake– To cook the apples thoroughly without overbrowning the crust, loosely cover the pie with aluminum foil for the initial baking period. After 35-45 minutes, remove the foil and bake uncovered for another 20-30 minutes, until the crust is golden brown and the filling is bubbly.
Baking To Perfection
Since the apples are not precooked, this pie requires a longer baking time. Because of this, there is a risk of the crust becoming overly brown or possibly burning. The solution, loosely cover the pie with aluminum foil during the first stage of baking. This will allow the apples to cook without running the risk of over baking the crust. The thickness of the apple slices will determine the duration of this initial baking, typically between 35-45 minutes. Additionally, the pie should be baked at 400℉ for the first 20 minutes and then lowered to 375℉ for the remainder of baking.
After the initial 35-40 minutes of baking, remove the aluminum foil and continue baking at 375℉ for another 20-30 minutes, or until the crust is golden brown and the filling is bubbly.
How To Store
Storing your homemade apple pie properly ensures it stays fresh, flavorful, and safe to eat. Here’s how to do it:
- Room Temperature– If you plan to enjoy the pie within a day or two, you can safely store it at room temperature. Simply cover it loosely with foil or a clean kitchen towel to protect it from dust and other contaminants while allowing air circulation, which helps maintain the crust’s flakiness.
- Refrigeration– For longer storage, refrigerate the pie. Place it in an airtight container or wrap it tightly with plastic wrap. Refrigerating helps preserve the flavor and texture for up to 4-5 days. Keep in mind that while refrigeration extends freshness, it can cause the crust to lose some of its crispness.
- Freezing– To store apple pie for an extended period, freeze it. Wrap the completely cooled pie tightly in plastic wrap and then in aluminum foil to prevent freezer burn. You can also use a freezer-safe bag. When ready to enjoy, thaw it overnight in the refrigerator, then reheat it in the oven at 350℉ for about 15-20 minutes to refresh the crust and warm the filling.
Frequently Asked Questions
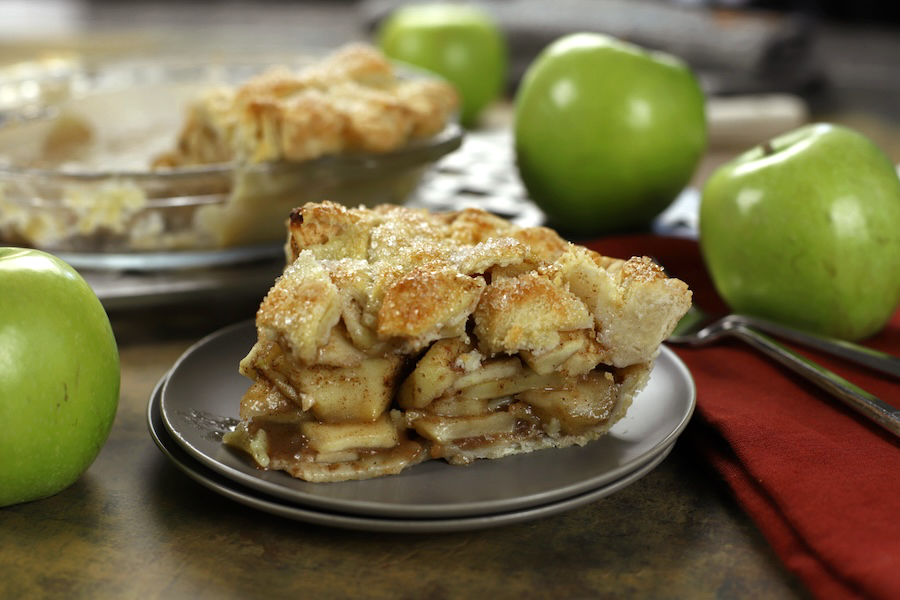
Should the apples be precooked?
When baking a homemade apple pie, precooking the apples isn’t necessary. In fact, in this recipe, the apples are baked raw, which allows them to release their natural juices and develop a deep, rich flavor. The pie will bake longer, and by covering it with aluminum foil during the initial stage, the apples soften perfectly without overbrowning the crust. This method ensures a beautifully balanced pie with tender apples and a golden, flaky crust.
Why use a lattice crust?
Both a lattice or solid top work great for homemade apple pie, but there’s something about a lattice top that’s just so beautiful. Plus, you’ll feel seriously accomplished after making it.
How do I keep the lattice crust from burning?
To keep your lattice crust from burning, loosely cover the pie with aluminum foil during the initial baking. This protects the crust while the apples cook, ensuring everything bakes evenly without over-browning. Remove the foil in the final stage to let the crust turn golden and crisp. See recipe card or “Baking to Perfection” section above for more details.
What is the best type of sugar for the top of the pie?
For the top of your pie, both granulated and sparkling sugar work well. Granulated sugar adds a subtle sweetness and a light crunch, while sparkling sugar gives your pie a stunning finish with extra shine and texture. I used sparkling sugar for its unique beauty, making the pie look as good as it tastes.
Are both flour and cornstarch necessary for the filling?
Using both flour and cornstarch in your apple pie filling isn’t strictly necessary, but it can be beneficial. Flour helps thicken the filling and makes it a bit creamy, while cornstarch gives it a smooth, clear texture. Together, they make sure your filling is the right thickness and looks great!
Homemade Apple Pie
Equipment
- Pizza Cutter *Easiest way to cut the strips for a lattice top.
Ingredients
Pie Crust Ingredients
- 2 1/2 cups all purpose flour *plus extra for rolling out chilled dough (about 1/2 cup)
- 1 cup butter *preferably grass-fed butter cut into large chunks, see Note #1 below
- 1/2 teaspoon salt *see Note #2
- 1 tablespoon granulated sugar
- 7 tablespoons ice water *see Note #5 below
Apple Filling Ingredients
- 3 pounds granny smith apples *about 6-7 medium sized apples, see Note #3 below
- 3/4 cup granulated sugar
- 1/4 cup brown sugar *packed, either light or dark brown sugar
- 1 tablespoon lemon juice
- 2 tablespoons all purpose flour *See Note #4 below
- 2 tablespoons cornstarch
- 2 teaspoons ground cinnamon
- 1/4 teaspoon ground nutmeg
- 1/8 teaspoon ground allspice
- 1/8 teaspoon ground cloves
- 2 tablespoons butter *cut into small pieces
Egg Wash Topping
- 1 large egg
- 1 tablespoon water
- 3 tablespoons sparkling sugar
Instructions
Pie Crust
- Combine the flour, salt, and sugar in a large mixing bowl. Add the large chunks of chilled butter.
- Gently toss the butter in the flour mixture until it's lightly coated.
- Transfer the mixture to a flat surface. Using a rolling pin, roll the butter into thin sheets. Use a bench scraper to scrape any dough off the rolling pin.
- Use the bench scraper to transfer the mixture back into the bowl, then add ice water. Gently toss the mixture. See Note #5 below.
- Transfer the flour mixture back onto the flat surface. Continue the process of rolling the flour mixture and then using the bench scraper to fold the mixture over itself repeatedly until it comes together and forms layers. Lightly flour rolling pin as needed in between rolls. See Note #6 below.
- Once the dough is combined, divide it into two equal portions. Wrap each portion tightly in plastic wrap and refrigerate for at least 1 hour, or up to overnight.
Apple Filling
- Peel, core and slice apples into approximately 1/4 inch thickness.
- In a large bowl combine apple slices with lemon juice, sugars, flour, cornstarch and spices.
- Toss gently until the apples are evenly coated. Let the mixture sit for approximately 15-20 minutes to allow the flavors to marry and the apples to release some juices.
Assembly of Bottom Crust and Filling
- Meanwhile, preheat the oven to 400°F and place a baking sheet on the lower rack to catch any drips.
- While oven is preheating, place pie dough at room temperature for approximately 10 minutes to allow for easier rolling of the dough.
- On a lightly floured surface, roll out one pie dough portion into a 12-inch circle, about 1/4 of an inch thickness.
- Use a bench scraper to lift the dough and carefully transfer it to a 9-inch pie dish, letting any excess dough hang over the edges.
- Transfer the apple slices to the prepared pie pan, making sure to scrape in all the juices and spices from the bowl.
- Flatten and arrange the apple slices evenly. Cut the 2 tablespoons of butter into small pieces and dot them evenly over the filling.
Assembly of Top Crust option #1 {Solid Top}
- On a lightly floured surface roll second pie crust portion into a 12-inch circle.
- Use a bench scraper to gently lift the dough and carefully drape it over the apple slices.
- Trim excess dough, leaving about a 1 inch overhang.
- Fold the overhang over, then crimp by pressing the dough between your inside finger and the thumb and pointer finger of your other hand. Repeat around entire edge to seal. See Note #7 below.
- Cut a few small slits in the top crust to allow steam to escape and proceed with egg wash.
Assembly of Top Crust option #2 {Lattice Top}
- On a lightly floured surface, roll out the top pie dough into a 14-inch circle (a little larger than the bottom crust).
- Using a pizza cutter, cut the rolled dough into strips, about 1/2 inch wide. You will need approximately 16-18 strips in total.
- Lay half of the strips horizontally across the pie. Fold back every other strip and place a new strip vertically across them. Unfold the original strips over the new vertical strip. Repeat the process with the remaining strips, weaving them to form a lattice pattern.
- Trim excess dough, leaving about a 1 inch overhang.
- Fold the overhang over into the pie, then crimp by pressing the dough between your inside finger and the thumb and pointer finger of your other hand. Repeat around entire edge to seal. See Note #7 below.
Egg Wash
- In a small bowl, whisk together an egg and 1 tablespoon of water. Using a pastry brush, evenly coat the top with the egg wash, then generously sprinkle with sparkling or granulated sugar.
Baking the Pie
- Place a baking sheet on the bottom rack of the oven to catch any potential drips.
- Loosely cover the pie with two overlapping sheets of aluminum foil, tucking the edges around the dish to prevent the crust from browning too quickly.
- Bake at 400℉ for 20 minutes, then reduce the temperature to 375℉. Continue baking for another 40-45 minutes, removing the foil for the last 20 minutes, until the top is golden brown and the filling is bubbly.
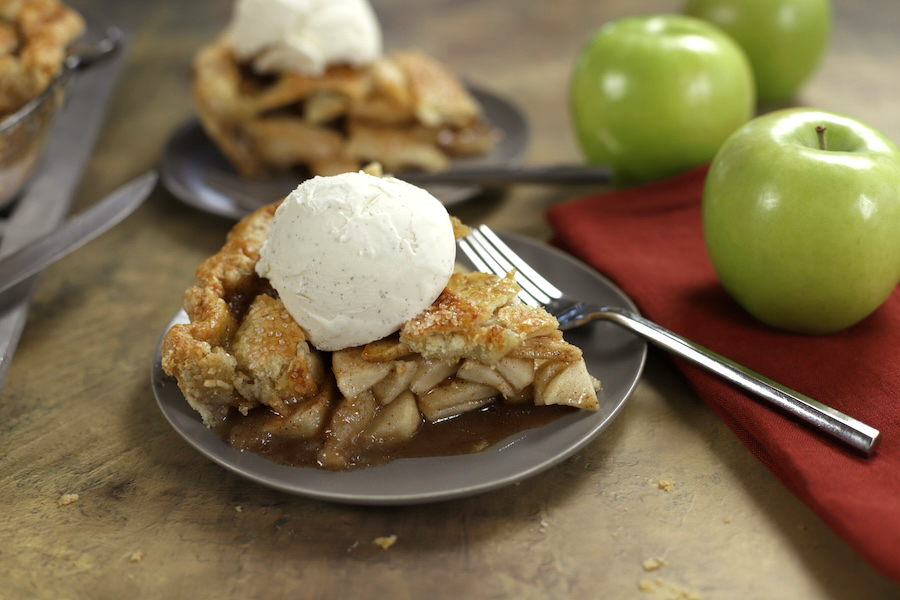
- Once baked, remove the pie from the oven and place it on a wire rack to cool for at least 2 hours before slicing. This allows the filling to set properly.
- Serve the pie warm or at room temperature, optionally with a scoop of vanilla ice cream or whipped cream.