Asian Braised Beef Short Ribs
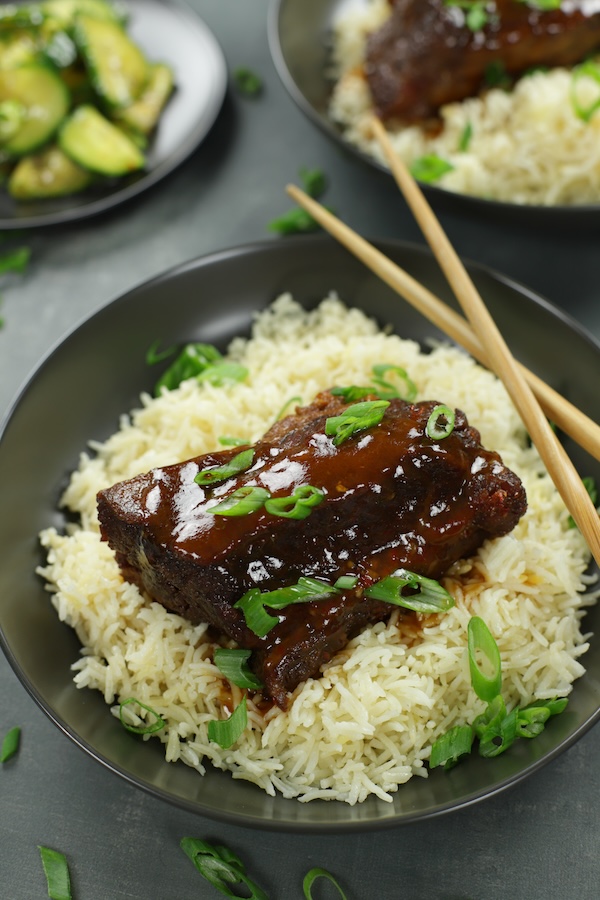
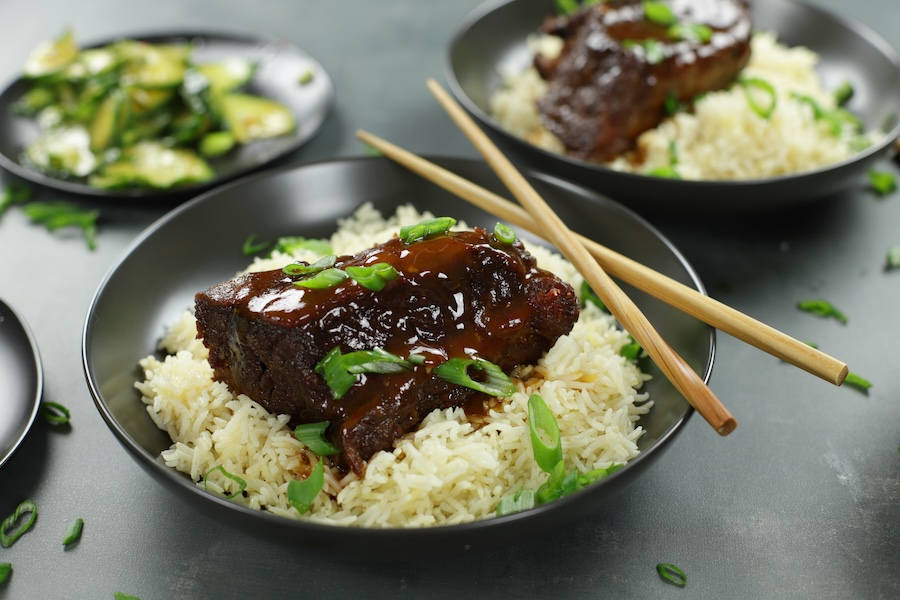
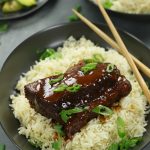
Asian Braised Beef Short Ribs are tender, deeply flavorful, and melt in your mouth with every bite. Slow-cooked in a savory aromatic Asian sauce, they’re the definition of comfort and elegance. With easy-to-follow steps, even a beginner can create this show-stopping dish. Serve over fluffy rice, drizzle with the luscious sauce, and finish with green onions for a meal that’s truly unforgettable.
This post may contain affiliate links, meaning I earn a small commission if you make a purchase—at no extra cost to you. Additionally, AI was used to assist with spelling, grammar, sentence clarity, and creative brainstorming.
Asian Braised Beef: From Cozy Dinners to Celebrations
Asian braised beef is a dish that fits any occasion. Its tender, flavorful meat and rich, savory sauce make it perfect for a weekend dinner when you have time to let the magic of braising happen. This dish is equally suited for celebrations, impressing guests with bold flavors and melt-in-your-mouth texture. Whether it’s a family gathering, holiday feast, or special dinner party, Asian braised beef is a stunning centerpiece that’s easy enough for new cooks to master.
Why Searing Is Key For Flavorful Short Ribs
Searing short ribs isn’t just about looks, it’s about building deep, irresistible flavor. When the meat hits a hot pan, it undergoes the Maillard reaction, creating a golden crust full of deep, savory flavor. This caramelization enhances the beef’s natural richness and infuses the braising liquid, transforming the entire dish into something unforgettable.
Foolproof Tips for Perfectly Searing Short Ribs
- Pat Dry for Success– Make sure the short ribs are thoroughly patted dry with paper towels. Moisture is the enemy of a good sear!
- Season the Ribs– Lightly coat all sides of the short ribs with enough salt that it’s visible but not piling up. Salt draws moisture to the surface, helping create a golden crust while enhancing the Maillard reaction for rich, savory flavor. This simple step lays the foundation for perfectly seared, flavorful ribs.
- Hot Pan, Right Oil– Heat a heavy skillet or Dutch oven over medium-high heat until hot (you should feel the heat a few inches above the surface). Add a small amount of high smoke-point oil and swirl. When the oil shimmers and moves easily, it’s ready for searing.
- Don’t Crowd the Pan– Sear in batches if needed. Overcrowding lowers the heat and prevents proper browning.
- Patience is Key– Let the ribs sear undisturbed for a few minutes per side until deeply golden brown. Resist the urge to flip too early!
What is Braising and Why It Works Wonders for Short Ribs
Braising is a slow-cooking method that combines searing meat at high heat and then simmering it in liquid at a low temperature. This technique works magic on short ribs by breaking down tough connective tissues, transforming them into melt-in-your-mouth tenderness. The low-and-slow cooking infuses the meat with rich, layered flavors from the braising liquid, making every bite juicy, savory, and deeply satisfying. It’s the secret to turning humble short ribs into a restaurant-worthy dish.
Beginner Tips for Braising Like a Pro
- Choose the Right Cut– Opt for well-marbled short ribs or tough cuts like chuck roast. They thrive with braising.
- Sear First– Always sear the meat to lock in flavor and build a rich base for the sauce. If new to searing, see above section Foolproof Tips for Perfectly Searing Short Ribs.
- Don’t Rush: Low and slow cooking with braising is key. The liquid should be kept at a gentle simmer (boiling will make the meat tough).
- Use a Tight Lid– Trapping steam in the skillet or Dutch oven ensures even cooking and keeps the meat juicy.
- Flavor the Liquid– The braising liquid does all the heavy lifting, infusing the short ribs with bold, complex flavors. Follow the recipe’s ingredients, it will create a sauce that’s nothing short of incredible.
Common Mistakes to Avoid When Braising Short Ribs
Braising short ribs is all about creating tender, flavorful meat, but a few missteps can lead to disappointment. First, don’t skip the sear. Browning the ribs develops deep, rich flavors that are essential. Avoid rushing the process; under-braising will leave the meat tough, while over-braising can dry it out. Use a heavy pot with a tight-fitting lid to maintain even heat and prevent too much liquid from evaporating. Lastly, season with care. Under-seasoning results in bland meat, while over-salting can overpower the dish as flavors concentrate during cooking.
Best Cut of Meat For Asian Braised Beef
Short ribs are the gold standard for Asian braised beef, offering rich marbling and a tender, melt-in-your-mouth texture when slow-cooked. Their fat content and bone add incredible depth of flavor to the dish. If short ribs aren’t available, cuts like chuck roast, beef shank, or brisket are excellent alternatives. These cuts are well-suited for braising as they become fork-tender and absorb the bold, savory flavors of the sauce beautifully. Prioritize well-marbled cuts for the best results.
Most Important Tools
- Large Enameled Cast Iron Dutch Oven– My favorite way to cook these short ribs is in a large enameled cast iron Dutch oven, and for good reason. The enamel coating makes cleanup a breeze, and the minimal upkeep is a huge bonus. Plus, it’s incredibly versatile. You can use it for everything from baking sourdough bread to braising meats and even making hearty soups or stews. Its ability to retain and evenly distribute heat ensures perfectly cooked short ribs every time. My second favorite option is a large stainless steel skillet with a lid, which also delivers great results.
- Long Handled Tongs– Long-handled tongs are a must for searing meat. They keep your hands safely away from hot oil while giving you the control needed to flip and adjust the meat for an even, beautifully golden crust.
- Mesh Strainer– Straining the braising liquid with a mesh strainer before thickening removes solids, like ginger slices, and ensures a silky-smooth sauce. This simple step creates a refined, restaurant-quality finish.
Ingredients Needed
- Beef Short Ribs– This cut of meat is rich, marbled, and perfect for braising. The slow cooking breaks down connective tissue, creating tender, flavorful meat that melts in your mouth.
- Salt– Used for searing, salt draws out moisture to create a beautiful crust on the ribs during browning. This step locks in flavor and builds the foundation for the dish.
- Toasted Sesame Oil– Adds a nutty, smoky complexity that enhances the overall flavor profile while infusing the dish with its signature aroma.
- Soy Sauce– The umami powerhouse! It provides depth, saltiness, and complexity to the braising liquid, tying the flavors together with its savory profile.
- Chili Garlic Sauce– Adds a touch of warmth and rich flavor without being spicy. The garlic enhances the savory notes, while the vinegar and spices in the sauce add tangy, complex layers that perfectly complement the beef.
- Ginger– Fresh ginger adds a warming, zesty brightness that complements the beef and other bold flavors, creating balance and depth.
- Garlic– Fresh garlic provides pronounced, aromatic punch that can’t be achieved from the chili garlic sauce alone. When braised, fresh garlic infuses the dish with a rich, savory base that enhances the overall flavor.
- Rice Vinegar– Provides a tangy acidity that lightens the richness and balances the sweetness, ensuring well-rounded and vibrant flavors.
- Brown Sugar– Lends a subtle caramel sweetness that enhances the soy sauce and vinegar, while helping to create a sticky, luscious glaze as the sauce reduces.
- Beef Broth– The foundation of the braising liquid, beef broth reinforces the meaty flavor while keeping the ribs moist and tender throughout the slow cooking process.
- Cornstarch and Water– This simple slurry thickens the braising liquid into a glossy, velvety sauce that clings beautifully to the ribs, enhancing both their presentation and flavor.
How To Make {Simplified Instructions}
Prepare the Ribs
- Preheat oven to 325°F (165°C).
- Pat the ribs dry with paper towels and season all sides with about 1 teaspoon of salt per rib.
- Heat a skillet or Dutch oven over medium-high heat, add oil, and heat until it shimmers.
- Sear ribs on all sides until browned, 2–3 minutes per side. Remove and set aside.
Braising Sauce
- In a bowl or measuring cup, mix all braising sauce ingredients.
Braise the Ribs
- Place the ribs back in the Dutch oven and pour the sauce over them, ensuring they are mostly submerged.
- Cover and bake for 3–4 hours, until the ribs are tender and falling off the bone.
Thicken the Sauce
- Remove ribs and strain the sauce into a saucepan, discarding solids.
- Mix cornstarch and water in a small bowl to make a slurry. Simmer the sauce over medium heat, whisking in the slurry until thickened to your liking.
Serving Suggestions for Asian Braised Beef
Serve these tender, flavorful short ribs with jasmine rice or short grain brown rice to soak up the rich sauce. Complement the dish with an Asian slaw, sautéed bok choy, or a crisp cucumber salad for balance. A side of lightly salted edamame adds a satisfying touch, while garnishes like fresh cilantro, sliced green onions, and sesame seeds complete the vibrant, restaurant-worthy presentation.
Storage and Reheating
Store the ribs in an airtight container in the refrigerator for up to 4 days or freeze for up to 3 months. When reheating, warm gently on the stovetop or in the oven at 325°F, adding a splash of broth or water if needed to keep the sauce smooth and the ribs tender.
Frequently Asked Questions
Can you make Braised Short Ribs ahead of time?
Absolutely! Braised short ribs are great to make ahead. They often taste even better the next day as the flavors develop. After cooking, store the ribs and sauce in an airtight container in the fridge for up to 4 days. When ready to serve, reheat on the stovetop or in the oven at 325°F, adding a little broth or water if needed to keep them tender. Making them ahead saves time and boosts flavor.
Do I need to trim the fat on the short ribs before cooking?
Trimming the fat on short ribs is optional and depends on your preference. The fat adds richness and helps keep the meat moist during cooking, but if there’s an excessive amount, you can trim some off before cooking. Just be careful not to remove too much, as it contributes to the flavor and tenderness of the dish. Any rendered fat can be skimmed off the sauce after cooking for a cleaner finish.
What’s the secret to achieving a perfectly thick and glossy braising sauce for a glaze?
To achieve a thick and glossy sauce, strain the braising liquid and combine 1 cup of it with a slurry made from 2 tablespoons of cornstarch and 2 tablespoons of water. Cook the mixture in a saucepan over medium heat, whisking constantly, until it thickens into a smooth glaze.
If you’d like a larger amount of sauce, use more braising liquid, keeping the proportions of 1 cup liquid, 2 tablespoons cornstarch, and 2 tablespoons water.
Can these short ribs be frozen?
Yes, these short ribs can be frozen! Allow them to cool completely, then transfer the ribs and some of the sauce to a freezer-safe container or bag. They can be frozen for up to 3 months. To reheat, thaw them in the refrigerator overnight and warm gently on the stovetop or in the oven at 325°F, adding a little broth or water if needed to maintain the sauce’s consistency and the ribs’ tenderness.
How do I make this recipe without a Dutch oven?
If you don’t have a Dutch oven, you can still make this recipe using a few alternatives:
- Use a Large Oven-Safe Pot or Deep Skillet with a Lid– Brown the short ribs and prepare the braising liquid as directed, then cover tightly with a lid or foil and bake in the oven.
- Use a Roasting Pan Covered with Foil– Sear the short ribs in a skillet, transfer them to a deep roasting pan with the braising liquid, and cover tightly with foil before baking.
- Use a Slow Cooker– Sear the short ribs on the stovetop, then transfer them and the braising liquid to a slow cooker. Cook on low for 8 hours or high for 4-6 hours until tender.
Asian Braised Beef Short Ribs
Equipment
- 1 7 quart enameled Cast Iron Dutch Oven See FAQ's above for other alternatives.
Ingredients
For the Beef Ribs
- 4 pounds beef short ribs *about 4 large ribs, see Note #1 below for alternative cuts
- 4 teaspoons salt *see Note #2 below
- 2 tablespoons high smoke point oil *see Note #3 below
For the Braising Sauce
- 1/2 cup soy sauce
- 1/2 cup rice vinegar
- 2 heads ginger *thinly sliced, about 1 cup
- 6 large garlic cloves *crushed or minced, about 2-3 tablespoons
- 6 tablespoons chili garlic sauce *see Note #4 below
- 1/3 cup toasted sesame oil
- 1/3 cup brown sugar *packed, either light or dark
- 2 1/3- 3 cups beef broth
For the Slurry
- 2 tablespoons cornstarch *see Note #5 below
- 2 tablespoons water *thinly sliced
Garnish
- 4 stalks green onions
Instructions
Prepare the Ribs
- Preheat your oven to 325°F (165°C).
- Lay the ribs on a platter or baking sheet and pat them dry with paper towels. Season all sides generously with about 1 teaspoon of salt per rib.
- Heat a heavy skillet or Dutch oven over medium-high heat until hot (you should feel the heat when holding your hand a few inches above the surface). Add oil and heat until it shimmers and moves easily, indicating it's ready for searing.
- Work in batches to avoid overcrowding the pan, searing the ribs on all sides until browned, about 2–3 minutes per side. Remove the ribs and set aside, then turn off the heat while you prepare the sauce.
Braising Sauce
- In a large bowl or glass measuring cup combine all the ingredients for the braising sauce.
Braise the Ribs (see Note #5 below)
- Return the seared ribs to the Dutch oven. Pour the braising sauce over them, ensuring they are mostly submerged.
- Cover with a lid and transfer to the preheated oven. Braise for 3-4 hours, or until the ribs are tender and falling off the bone.
Thicken Sauce
- Remove the ribs from the sauce.
- Strain the sauce into a saucepan, discarding the solids. See Note #6 below.
- In a small bowl, mix cornstarch with water to create a slurry. Bring the sauce to a simmer over medium heat. Gradually whisk in the slurry, stirring constantly, until thickened to your desired consistency.
Serve
- Serve the braised ribs over cooked rice. Drizzle with the thickened sauce and garnish with sliced green onions for a fresh, vibrant finish.

