Dad’s Old Fashioned Fudge
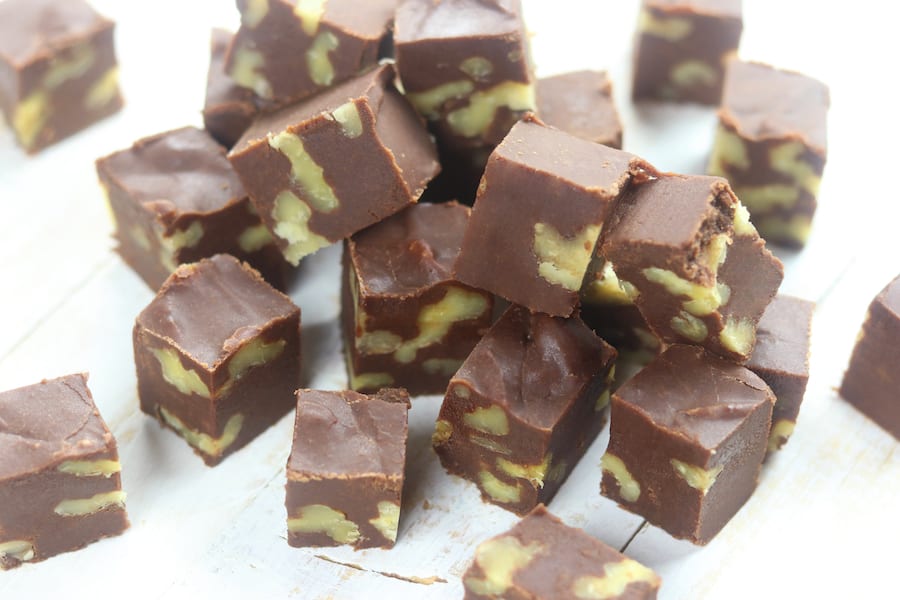
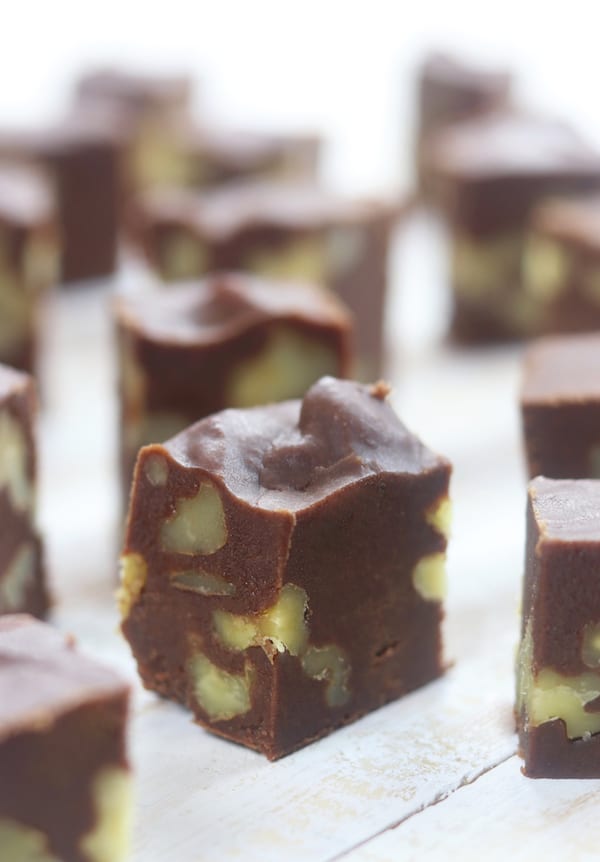
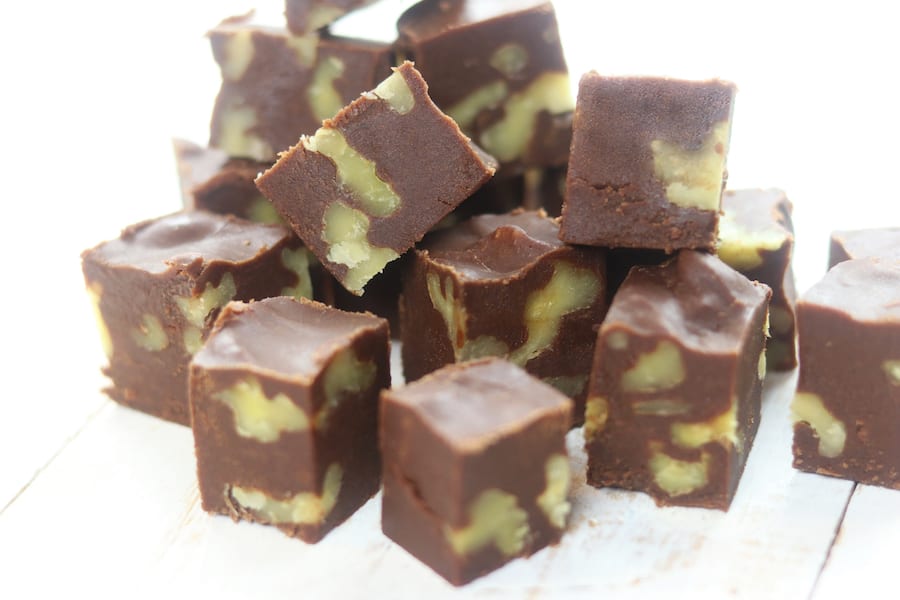
Dad’s Old Fashioned Fudge recipe has been in my family since about 1975 and is an absolute must-make every Christmas and Easter. With just 5 ingredients, it turns out rich, creamy and a complete crowd pleaser! We served this homemade fudge at my Dad’s funeral reception and the plate was wiped clean in minutes.
This post may contain affiliate links which I earn a small portion in sales if a purchase is made. Rest assured though, it is never at any additional cost to you.
History of this Old Fashioned Fudge Recipe
You know those recipes that have been woven into the holidays decade after decade and are made specially by one family member? It becomes such an integral part of the celebration that it would be missed almost as much as that family member itself if not present.
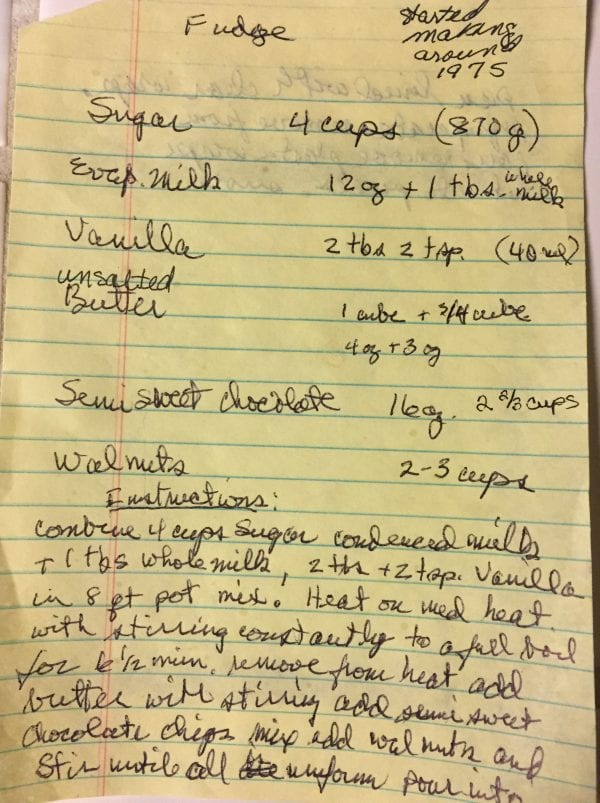
Well this Dad’s Old Fashioned Fudge recipe is that for us. My dad has been making this fudge since about 1975 EVERY SINGLE YEAR.
Even the year my mom passed this fudge was still present for our celebration.
Rumor has it that this recipe came straight from a very famous west coast candy shop, but we all know how rumors are…can’t always trust them.
Here is what I know for certain, my dad made several batches every year. My parents would gift this fudge along with all the other special Christmas goodies to family and church members.
A few years bak my dad passed away right before Thanksgiving. It was a heart wrenching holiday season.
It was about a week after his passing that I was sitting at my desk trying to wade through my piles of work while grieving, when it hit me…COMPLETE PANIC…”What happened to the fudge recipe” shot through my mind.
Reason for the Panic
Here is the background to my complete panic.
Last year I had told my dad that we should work on a post for the blog making his fudge recipe.
He proceeded to dive into deep explanation in a way that only my dad could do about how the evaporated milk sizes have changed over the years, thereby altering the way the recipe would have to be written.
I encouraged him, that since he was a scientist, I couldn’t think of a better person for rewriting the recipe with today’s proportions in mind. And he did just that, but my dad worked on his own time frame and didn’t get the rewritten recipe to me until January.
So I I tucked it away for the 2017 holiday season.
Sadly my dad passed and I completely forgot about it until that panic stricken moment. I had complete fear that I had lost the last hand written recipe my father had done for me.
Not only was it the last hand written recipe but HIS fudge recipe… I shot up out of my desk and tore through my notebooks with my heart pounding.
Complete Relief
Thank God it took but just a few minutes to find.
I saw those beautiful hand written words shining up at me and my tears began. Once the flood gates opened I think I cried for a good 4 hours straight.
I am so thankful that my father gifted me with this recipe so that I can carry on the tradition. We made this for his funeral reception and it was literally gone in a heartbeat. I am filled with joy over this because I can just see my dad right now. Grinning from ear to ear knowing that he made so many people happy for a moment while enjoying his fudge.
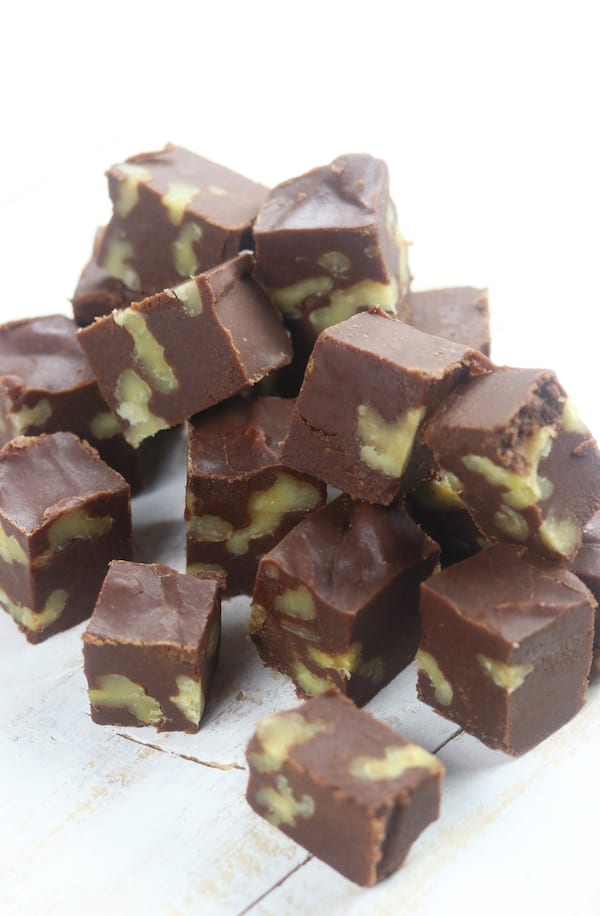
Ingredients for Dad’s Old Fashioned Fudge
- Sugar- Sweetens the mixture and contributes to the texture.
- Evaporated Milk- Contributes creaminess, sweetness, and depth of flavor.
- Half & Half- Helps achieve richness, creaminess, and a smooth texture.
- Pure Vanilla- Imparts a rich and aromatic taste, enhancing the overall flavor profile.
- Unsalted Butter- Adds richness and creaminess while helping to bind ingredients together.
- Semi-Sweet Chocolate Chips- Provide a decadent flavor and contribute to rich texture.
- Walnut Halves- Bring crunch, nutty flavor, and nice contrast to smooth texture of the fudge.
How To Make Old Fashioned Fudge Without a Candy Thermometer
- Lightly grease a 8 x 10 or 9 x 13 inch baking pan and line with parchment paper making sure parchment overlaps sides for easy removal later. Set aside.
- In a 8 quart pot combine sugar, evaporated milk, half & half and vanilla. Place pan over medium heat stirring constantly for approximately 6 1/2 mins. Mixture should come to a rapid boil for a full 2 mins. Once it comes to a rapid boil, start your timer for 2 minutes and continue stirring consistently.
- Take off heat. Add butter and continue stirring while adding in chocolate chips. Stir until chocolate is melted and mixture is completely smooth. Stir in walnuts.
- Pour chocolate mixture evenly into lined pan. Cool completely at room temperature and then chill for at least 2 hours.
- Once chilled gently run butter knife along sides of pan to loosen. Carefully remove fudge and loosen parchment from sides. With a large sharp knife carefully cut into small pieces. Keep refrigerated for a longer shelf life of up to 1 month.
Nut Variations
If you’re looking to experiment with different nut varieties in your walnut fudge recipe, there are several options that can work well. Here are a few nut suggestions that can complement the flavors of the fudge.
- Pecans- Pecans have a buttery and slightly sweet flavor that pairs wonderfully with chocolate.
- Almonds- Almonds offer a slightly milder and subtly sweet taste.
- Hazelnuts- Hazelnuts have a distinct and robust flavor that complements chocolate well and bring a combination of nuttiness and creaminess to the fudge.
- Cashews- Cashews have a creamy and slightly sweet taste. While they are milder in flavor compared to walnuts, they can add a pleasant texture and a touch of sweetness to the fudge.
- Macadamia Nuts: Macadamia nuts have a rich, buttery flavor and a creamy texture and create a nice contrast with the chocolate.
How to Store
- Cool Completely- Allow the fudge to cool completely at room temperature before storing it. This ensures that it sets properly and maintains its desired texture.
- Refrigeration- For longer shelf life, it is recommended to store the walnut fudge in an airtight container in the refrigerator. The chilled environment helps preserve the fudge and prevents it from softening or melting.
- Layering and Separation- To prevent the fudge pieces from sticking together or separating, place parchment or wax paper between the layers when storing them in the container. This will make it easier to separate the pieces when serving.
- Proper Sealing- Ensure that the container is tightly sealed to prevent any moisture or odors from affecting the fudge’s taste and texture.
- Shelf Life- Walnut fudge, when stored properly in the refrigerator, can typically last for up to 1 month. However, its quality may gradually decline over time, and it’s best to consume it within the first few weeks for optimal taste and texture.
- Freezing-Leave uncut and wrap tightly in plastic wrap or place in an airtight container. When properly stored, homemade Old Fashioned Fudge can last up to 2-3 months without significant loss in quality. To use, defrost in the refrigerator and then cut into individual pieces. If freezing individual pieces, the fudge will last about 6 weeks in the freezer before declining in quality.
Tips For Making Dad’s Old Fashioned Fudge
- Choose Pure Vanilla Extract- For a wonderfully rich and robust flavor, pure vanilla extract is recommended over imitation vanilla.
- Use Evaporated Milk- Make sure to use evaporated milk and not sweetened condensed milk. If you accidentally use sweetened condensed milk your fudge will be incredibly over the top sweet.
- Cut up the Butter– Before adding the butter in make sure to cut it into smaller pieces for faster melting.
- Best Pan to Use- The best type of 8 quart pan to cook this recipe in is a stainless steel 8 quart pot . However, if you use a ceramic coated cast iron pan the cooking time will increase. Note: Here is a trick to keep in mind, once the mixture starts to rapidly boil, continue cooking for another 2 full minutes and then take off of heat and add the rest of the ingredients. Ceramic coated cast iron pans cause the cooking time to almost double because the mixture takes longer to come to a rapid boil.
How Can I Present This As a Gift?
- Container- Choose an appropriate container to hold the fudge such as a decorative tin, mason jar, or cellophane bag tied with ribbon.
- Presentation- Consider presenting the fudge gift on a decorative tray or within a gift basket to make it even more special.
- Liner- If necessary, line the container with parchment paper, wax paper or colorful tissue paper to add a decorative element and to prevent the fudge from sticking to the container.
- Decorative Touches- Enhance the visual appeal of the gift by adding your own special touch. Sprinkle powdered sugar or cocoa powder lightly over the fudge. Alternatively you can place whole nuts, sprinkles, or chocolate shavings over some of the fudge pieces.
- Personalize- Attach a label or gift tag to the container to provide information about the fudge, such as the flavor or any special ingredients used. You can also include a personalized message or a recipe suggestion to make the gift more meaningful.
Frequently Asked Questions
What is the best type of chocolate to use for fudge?
The best type of chocolate for fudge is high-quality semisweet or bittersweet chocolate, which typically contains around 60-70% cocoa solids. The higher cocoa content provides a richer and more intense chocolate flavor.
Do I need to use a candy thermometer to make this recipe?
No candy thermometer is required for this fudge recipe, as it was developed to be made successfully without using one.
Can I eliminate the walnuts?
Absolutely! This homemade fudge recipe tastes wonderful with or without nuts.
More Delicious Christmas Candy and Treats
White Chocolate Christmas Fudge
Dad’s Old Fashioned Fudge
Ingredients
- 4 cups granulated sugar
- 12 oz can evaporated milk
- 1 tbsp half & half or whole milk
- 2 tbsp + 2 tsp pure vanilla
- 7 oz unsalted butter 1 cube + 3/4 cube
- 16 oz semi sweet chocolate chips (or bars) 16 oz = 2 & 2/3 cups chocolate chips, *See Note #1 below
- 2-3 cups walnut halves
Instructions
- Lightly grease a 8×10 or 9×13 inch baking pan and line with parchment paper making sure parchment overlaps sides for easy removal later. Set aside.
- In a 8 quart pot combine sugar, evaporated milk, half & half and vanilla. Place pan over medium heat stirring constantly for approximately 6 1/2 mins. Mixture should come to a rapid boil for a full 2 mins. Once it comes to a rapid boil, start your timer for 2 minutes and continue stirring consistently.(IMPORTANT See Note #2 below)
- Take off heat. Add butter and continue stirring while adding in chocolate chips. Stir until chocolate is melted and mixture is completely smooth. Stir in walnuts.
- Pour chocolate mixture evenly into lined pan. Cool completely at room temperature and then chill for at least 2 hours. Chill for at least 2 hours.
- Once chilled gently run butter knife along sides of pan to loosen. Carefully remove fudge and loosen parchment from sides. With a large sharp knife carefully cut into small pieces. Keep refrigerated for a longer shelf life of up to 1 month.
Notes
Nutrition
For more recipe inspiration follow along on Facebook and Pinterest.





This fudge is a must try!! Thanks for sharing!!!
Saving this one to make with the kids!
YAY!! I hope you enjoy!
What an amazing story! I have my grandmother’s recipe book I learnt to bake from and it’s one of my most treasured things
I love that Erin. Old family recipes and cookbooks are the absolute best!❤️
Everything about this fudge is so perfect, and love that bit of texture in the walnuts!
Thank you Joanne! I can’t even imagine having it without walnuts after so many years now of that tradition.
I need this fudge! So mouthwatering!
Thank you Jennifer! It really is.
Fudge is my ultimate weakness and this just melts in your mouth!
Thank you Erin! It is such a weakness of mine also.
This is the most perfect fudge ever!
❤️❤️❤️
Who could resist this fudge? I loved all of the great tips! My grandfather was known as the expert fudge maker in my house.
I do believe that this fudge is what’s responsible for my clothes not fitting every Holiday season. ????
This is such a perfect treat!!
Thank you Toni!
Fudge is my favorite holiday treat. I can’t wait to try your dad;s version.
I hope you love as much as we do!
Dear Heather, I cannot thank you enough for sharing your dear Dad’s amazing fudge recipe. I was looking for a fudge recipe to make at Christmas-time last year as I have never made real old fashioned fudge. I searched and searched and then I found your blog. The ingredients were perfect. I’ve made the microwave fudge with marshmallows…not good at all and I refuse to ever make that again. So, I did, I made your Dad’s fudge and it was over-the-top fantastic! It reminded me of he fudge I had as a child. The kind a certain candy company used to make back in the day, which is horrible today. I found that I liked it even more days after making it as it started to firm up around the outside. So good! Finger licking good! The recipe makes so much that I was able to share (generously) with family and friends, which they loved! I will be making your Dad’s fudge every year at Christmas. I can’t thank you enough for sharing such a wonderful recipe, but mostly, the story behind it. Blessings to you and your dear Dad in heaven. Thank you, thank you, thank you!!!!
Oh Annie, this was seriously the sweetest message. Big old tears pouring down my face as I read it! Thank you so much for taking the time to not only make the fudge but also to come back and share with me. You have given me all kinds of inspiration today! Thank you so much!!!!
I forgot to give this recipe a 5-STAR rating…if I could give it a perfect 10 I would!!!
Is this recipe make ahead and freezable? If so what is the shelf life in the freezer?
Cant wait to try it!
Hi Wendi,
Yes, it is both make ahead and freezable. It keeps well in the refrigerator for up to a month and up to 3 months in the freezer (in an airtight container). I hope you enjoy!
can you add peanut butter to this fudge?
That is such a good question! I haven’t done it but now I want to try!!
Can’t wait to try this. So are the 2 min. Boiling part of the 6 min stirring on medium heat? Or are you saying around the 6.5 min. It should start to boil and to continue for 2 min?
Thanks!!
Hi Rike!
Such a good question. The fudge needs to have a rapid boil for a full 2 mins. The total time over medium heat is approximately 6 1/2 mins with the 2 mins included. However, it could take a little longer depending on the type of pan that is used.
I hope you enjoy!
I don’t have unsalted butter, do you think salted will run it?
Hi Kate,
This is such a good question and kind of challenging to answer. I don’t believe it will ruin the fudge, however the salt will be noticeable. I would recommend to stick with unsalted butter. I hope this helps.
This is the same old fashioned fudge recipe that was passed down from my great Aunt Gerti. Who by the way was from California. I remember she stressed the importance of using Milnot evaporated milk. Mom experimented with other brands but the fudge did not have that same great taste as it did with Milnot. Another thing we do differently is cook it in a very large iron skillet. It has been the only way for us to cook it to perfection. And your is right. The weight of the cans are smaller so you do have to adjust your amounts of what you use.
Aren’t old recipes the best? Thank you for your insight and Happy Holidays!
Thank you so much for posting this! I’ve been looking for my grandmother’s fudge recipe and knew it used evaporated milk and had 4 cups of sugar in it. I haven’t seen anything else similar our there … I think this is it and will be trying it out tomorrow!
I’m so glad to hear this Mo! It is so hard when you feel like you can’t find a cherished family recipe. I hope this is exactly what you are looking for. Have a very Happy New Year!!
Do we stop stirring when it comes to a boil and let it boil unstirred for 2 minutes and THEN start the stirring process again? I stirred too much last year and got grainy fudge and am excited to try your Dad’s recipe– “Place pan over medium heat stirring constantly for 6 1/2 mins. Mixture should come to a rapid boil for a full 2 mins. Take off heat. Add butter and continue stirring while adding in chocolate chips.”
Hi Rachel, this is such a good question. So, you will stir the entire time and the mixture will be over the heat source for approximately 6 1/2 mins (depending on the type of pan you use). Of those 6 1/2 mins the mixture needs to come to a full boil for 2 mins (you will still be stirring during this time). Once it hits the 2 min mark of a rapid boil take it off the heat and proceed with the recipe.
I hope this helps and please let me know how it turns out. Enjoy!
Hi! It’s been almost 3 hours and the fudge is still too soft to take out. Do you know what I did wrong and if I should just give it more time or scrap the whole thing? Thanks!
Hi Amber,
I would let the fudge sit in the refrigerator over night. If it still is not set then yes, I would start again (I am so sorry to say because I know how frustrating that is).
My biggest suggestion is the total time on the heat source will vary depending on the type of pan you are using. Once it does come to a rapid boil, let it boil for a full 2 minutes.
Please do not hesitate to reach out to me in the morning as I am more than happy to answer any questions.
Have a wonderful night!
Sadly, the fudge did not set up I I did something wrong when it came to the boiling part. I’ll try again next year but thank you for responding. I don’t really want to waste all those ingredients, do you think there’s anyway I can repurpose the mushy fudge as maybe a frosting or something, if not it’s completely fine. Thank you for your time!