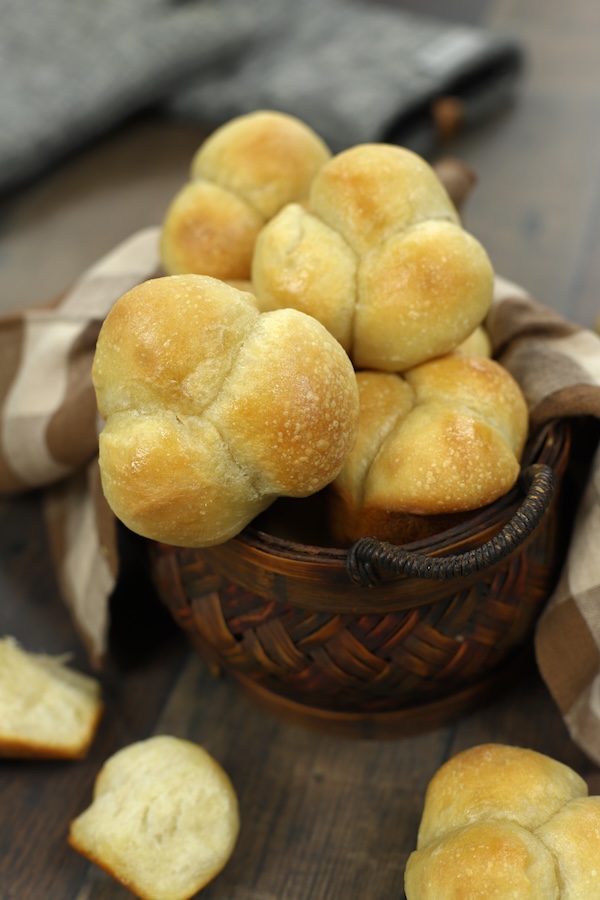
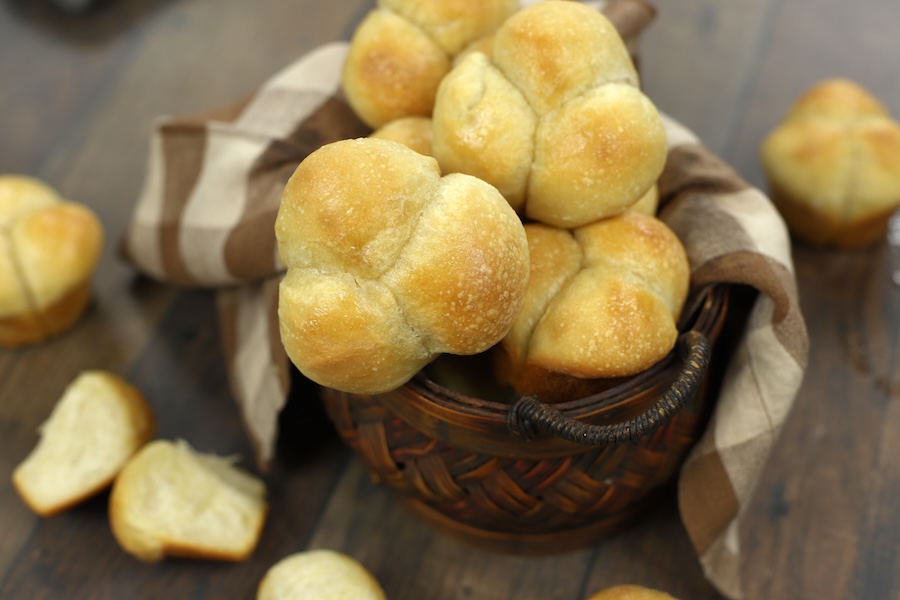
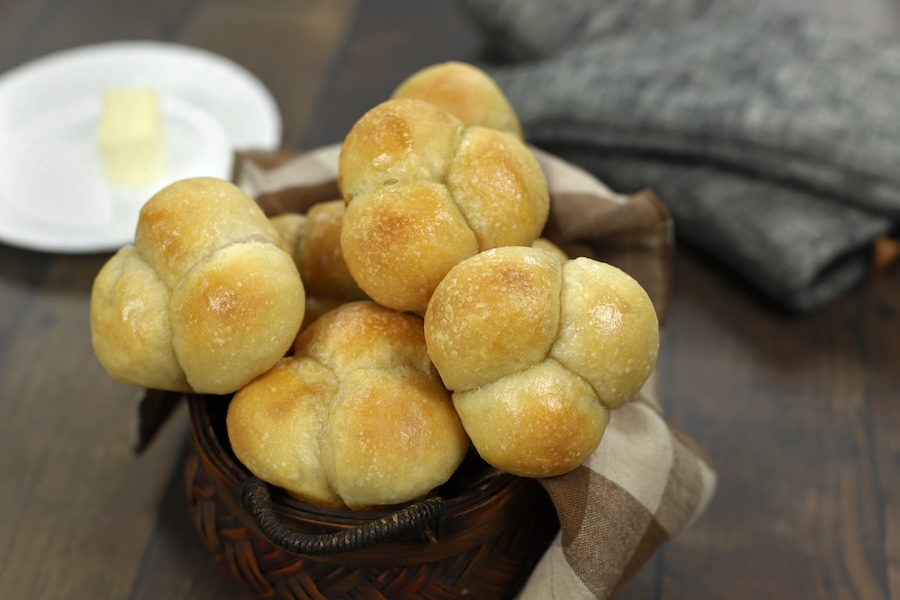
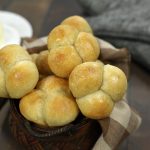
Sourdough Cloverleaf Rolls
Soft, chewy, and irresistibly tangy, these Sourdough Cloverleaf Rolls are pure perfection. Made with my Easy Sourdough Starter, this recipe is broken down into simple steps, making it approachable for beginners while delivering bakery-quality results.
This post may contain affiliate links, meaning I earn a small commission if you make a purchase—at no extra cost to you. Additionally, AI was used to assist with spelling, grammar, sentence clarity, and creative brainstorming.
The Perfect Sourdough Rolls for Any Table
These Sourdough Cloverleaf Rolls are soft, chewy, and have that irresistible tang only sourdough can give. The pull-apart layers make them fun to eat, and since they’re dairy-free, they are perfect for almost any table. If you’ve had success with my Soft Sourdough Sandwich Bread, you’ll love this recipe. It’s just as approachable but in a dinner roll form. Whether you’re new to sourdough or a seasoned baker, these rolls are the perfect addition to any meal.
The Timeline In Making Sourdough Dinner Rolls
Making sourdough dinner rolls from scratch is a time investment, but the process is simple and so rewarding. If you don’t have an active starter yet, you’ll need 7 to 9 days to get one going with my Easy Sourdough Starter. It’s truly an easy process, just a little patience required. Once your starter is bubbly and thriving, these rolls take one to two days from start to finish, depending on whether you do the bulk rise at room temperature or in the refrigerator. Most of that time is hands-off, allowing the dough to develop incredible flavor. Keep in mind that colder weather slows proofing, so expect longer rise times in the winter. With a little planning, you’ll have soft, tangy, pull-apart rolls worth every minute.
Start with Easy Sourdough Starter for Irresistible Dinner Rolls
A great sourdough starter is the key to soft, flavorful dinner rolls, and my Easy Sourdough Starter makes the process simple. Many new bakers have had huge success with it, no special kit required! All you need are basic ingredients, a few simple tools, and a little patience. It takes about a week to develop, but the hands-on time is minimal. Once your starter is bubbly and thriving, you’ll be ready to bake incredible sourdough rolls with that perfect chewy texture and tangy flavor.
Most Important Tools Needed
- Digital Kitchen Scale– Flour settles and compacts differently each time it’s scooped, which can lead to inconsistent measurements when using cups. Weighing ensures accuracy, giving you the right flour-to-liquid ratio for soft, evenly textured cloverleaf rolls every time. Note: Along with using a scale, a bubbly, thriving sourdough starter is key to achieving phenomenal flavor and texture in your rolls.
- Dough Scraper– Essential for effortlessly removing sticky dough from the bowl without deflating it.
- Bench Scraper– Essential for lifting dough with ease, cutting clean portions, and keeping your work surface mess-free. It’s a must-have for effortless handling and cleanup.
- Kitchen Thermometer– Ensures water is at the ideal 105–115°F for optimal fermentation, helping your dough rise and develop the perfect texture.
- Muffin Pans– I’ve recently fallen in love with these for their easy cleanup and PFAS- and PFOA-free surface. They also promote even baking and a golden crust, making them perfect for cloverleaf rolls.
Ingredients Needed
- Sourdough Starter– This is what makes your rolls rise naturally, giving them a soft, airy texture. It’s a living culture of wild yeast and bacteria that creates bubbles in the dough for lift while adding a subtle tangy flavor. A strong, active starter is the key to light and fluffy rolls!
- Sugar or Honey– A little sweetness goes a long way. It helps feed the wild yeast, encouraging a better rise, while also giving the rolls a golden-brown crust and a touch of extra flavor.
- Warm Water (105℉ to 115℉ / 40℃ to 46℃)– Water does more than just hydrate the flour, warm water helps keep your starter active and encourages a steady rise, especially in cooler kitchens.
- All Purpose Flour– The backbone of your dough, flour gives the rolls their shape and texture. All-purpose flour creates a soft, tender crumb, while bread flour makes them chewier. Once you’re comfortable with the recipe, try adding whole wheat or rye for extra flavor. King Arthur Flour is my go-to for its unmatched quality and reliability. Ordering directly from them supports a company that’s 100% employee-owned, committed to sustainability, and dedicated to helping bakers of all levels succeed.
- Salt– Not just for flavor, salt also strengthens the dough, helping it hold its shape and preventing over-proofing. Plus, it keeps your rolls fresh longer.
- Oil– This is what makes your rolls irresistibly soft and tender. Oil coats the flour, slightly limiting gluten development for a more delicate crumb. Extra virgin olive oil or avocado oil are my go-to choices for their rich, delicious flavor.
How To Make {Simplified Instructions}
Mixing the Dough
- In a large bowl, combine the sourdough starter, sugar, and warm water. Stir until dissolved.
- Add the flour and salt, mixing until mostly combined.
- Add the oil and mix until a rough dough forms.
- Cover with greased plastic wrap and let rest for 45 minutes.
Stretch and Fold
- Take one side of the dough, stretch it upward, and fold it over the center.
- Rotate the bowl and repeat, working around the dough for about a minute.
- Cover and let rest for 30 minutes.
- Repeat this four times to develop structure.
First Rise (Bulk Fermentation)
- Let the dough rise at room temperature for about 4 hours until noticeably puffed, or
- Refrigerate for up to 12 hours for a delayed bake.
Shaping the Rolls
- If refrigerated, allow the dough to come to room temperature before shaping.
- Grease two muffin pans and set aside.
- Lightly flour your hands and work surface.
- Fold the dough over itself 5-6 times to build structure.
- Using a bench scraper, divide the dough into small pieces. Each should weigh 23-26g.
- Lightly dust each piece with flour.
- Fold the edges of the dough piece toward the center to create a smooth, taut surface.
- Pinch and twist the bottom to seal.
- Place three dough balls seam side down into each muffin cup.
Final Proof (Second Rise)
- Cover the muffin pans with greased plastic wrap.
- Let the rolls proof until they have expanded and filled the muffin cups, about 1-2 hours.
Baking the Rolls
- Preheat the oven to 375°F (190°C) for 30 minutes before baking.
- Bake for 25 minutes, or until golden brown.
- For extra richness, add a dab of butter on top while the rolls are still hot.
Tips for Shaping Cloverleaf Rolls
- Weigh for Consistency– To ensure even baking, weigh each dough piece to 23-26 grams before shaping. This keeps the rolls uniform in size.
- Lightly Flour, But Don’t Overdo It– A light dusting of flour on your hands and work surface prevents sticking without drying out the dough.
- Create Surface Tension– When shaping each ball, fold the edges toward the center a few times while gently pulling the dough to create a smooth top. This helps the rolls hold their shape during proofing and baking.
- Pinch and Twist the Bottom– Sealing the bottom of each ball by gently pinching and twisting helps keep the dough balls intact.
- Proof Until Puffy and Filled In– Let the rolls rise until they’ve expanded and filled the gaps in the muffin cups. This ensures a light, airy texture once baked.
Top Tips for Proofing, Baking, and Storing
First Proofing (Bulk Fermentation) Tips
- Room Temperature vs. Refrigeration– Let the dough rise for about 4 hours at room temperature or up to 12 hours in the fridge. A longer, colder proof enhances flavor.
- Look for Signs, Not Just Time– The dough should expand noticeably and feel light and airy. It doesn’t need to double, but it should show good fermentation activity.
- Cold Dough Needs Extra Time– If the dough hasn’t risen much in the fridge, additional proofing time will be needed after it comes to room temperature before shaping. Be patient, this ensures a lighter texture in the final rolls.
Final Proofing Tip
- Proof Until Puffy– Once shaped, let the rolls rise until they fill the muffin cups and look noticeably puffed, about 1-2 hours depending on room temperature.
- Avoid Overproofing– If the dough rises too much, the rolls may collapse or turn dense. They’re ready when they slowly spring back when gently pressed.
- Cover to Prevent Drying– Use greased plastic wrap to keep the dough from forming a tough skin while proofing.
Baking and Storing Tips
- Preheat for Best Rise– Heat the oven to 375°F (190°C) for 30 minutes before baking. A properly preheated oven ensures strong oven spring, helping the rolls rise fully and develop a soft, airy crumb.
- Golden Brown Perfection– Bake for 25 minutes, or until the tops are golden and the rolls sound slightly hollow when tapped.
- Butter for Extra Softness– For a glossy, rich finish, brush the rolls with a dab of butter while still hot.
- Short-Term Storage– Keep rolls in an airtight container at room temperature for up to 2 days.
- Freezing for Later– Freeze in a sealed bag or container for up to 3 months. Thaw at room temperature or warm in the oven at 300°F (150°C) for 10 to 20 minutes before serving.
Best Ways to Serve Sourdough Cloverleaf Rolls
These rolls are fun to eat, incredibly comforting, and pair beautifully with a variety of meals. They’re perfect along side hearty soups like Italian White Bean Soup, Beef Noodle Soup or Lemon Chicken Soup. When it comes to holiday celebrations, these rolls shine alongside show stopping main dishes like Standing Rib Roast, Oven Roasted Tri-Tip, or a perfectly cooked Ribeye Steak, making every gathering feel extra special. For lighter options and yet incredibly satisfying, serve with Italian Chopped Salad, Tomato Caper Pasta or Chicken Berry Salad.
Frequently Asked Questions
Can I use non bubbly discard for this recipe?
For the best results, you’ll want your starter to be highly active and bubbly before making these rolls. A sluggish or non-bubbly discard won’t give the dough the strength and rise it needs, leading to dense rolls. If your starter isn’t quite there yet, give it a few good feedings until it’s lively and doubling reliably. Your patience will pay off with soft, tangy, pull-apart rolls that are absolutely worth the wait.
How do I know when the rolls are ready to bake?
You’ll know your rolls are ready to bake when the three dough balls in each muffin cup have expanded and risen enough to press snugly against each other. They should look puffy and airy, with a slight jiggle when you gently shake the pan. If they still look separate or feel dense, give them more time to proof. Sourdough thrives on patience, and a well-proofed roll bakes up light, soft, and beautifully golden.
How do I know if my dough is properly kneaded?
No traditional kneading needed here! Instead, the stretch and fold process gradually develops the gluten, creating a dough that is strong, elastic, and smooth. After completing all four rounds, your dough should feel supple and slightly bouncy when you handle it. It will hold its shape better and have a soft, slightly puffy texture rather than feeling sticky or slack. If you gently stretch a piece, it should have some resistance without tearing easily. This slow gluten development gives your rolls their light, airy structure and perfect chew, all without the extra work of kneading.
What is the best way to reheat the rolls without drying them out?
One of the best ways to reheat these rolls without drying them out is to wrap them in foil and warm them in a 300°F oven for about 10 to 20 minutes, or until heated through. This keeps them soft and prevents moisture loss. For a quicker option, microwave them with a damp paper towel for 10 to 15 seconds.
How do I know when the rolls are fully baked?
You’ll know your rolls are fully baked when they turn golden brown and sound hollow when tapped on top. For extra assurance, you can check the internal temperature, it should be 190-200°F. If the tops are browning too quickly before they’re done, lightly tent them with foil.
Can I make these rolls without a muffin tin?
Yes! If you don’t have a muffin tin, you can arrange the dough balls on a parchment-lined baking sheet, placing them close together so they touch as they rise. This will create pull-apart rolls with a similar soft texture. You can also bake them in a greased cake pan or cast iron skillet for a beautiful, rustic presentation. Just keep an eye on the proofing. They are ready to bake when they’ve expanded and pressed snugly against each other!
Sourdough Cloverleaf Rolls
Ingredients
- 150 grams Easy Sourdough Starter *bubbly and active
- 20 grams granulated sugar
- 325 grams warm water *105℉ to 115℉ (40°C to 46°C)
- 500 grams all purpose flour *unbleached, See Note #1 below
- 15 grams salt
- 35 grams oil *avocado or olive oil
Instructions
Mixing the Dough
- In a large bowl, weigh and combine the sourdough starter, sugar, and warm water. Stir until the starter is mostly dissolved. Note: Be sure to tare your scale before weighing each ingredient so you get accurate measurements. See Note #2 below
- Add the flour and salt, then mix with a wooden spoon or your hand until most of the flour is incorporated.
- Add the oil and continue mixing until a rough, shaggy dough forms. Cover the bowl with lightly greased plastic wrap and let it rest at room temperature for 45 minutes. See Note #3 below
Stretch and Fold
- After the dough has rested, take one side and gently stretch it upward, then fold it over the center. Turn the bowl slightly and repeat, working your way around the dough for about one minute.
- Cover the bowl again and let the dough rest for 30 minutes. Repeat this stretch, fold, and rest process a total of four times. This helps build strength in the dough and improves the texture of the rolls.
First Fermentation (Bulk Rise)
- Once the last stretch and fold is finished, let the dough rest and rise. You can either keep it at room temperature for about 4 hours (depending on ambient temperature) until it looks noticeably puffed up, or refrigerate it for up to 12 hours if you want to bake later.
Shaping the Rolls
- Note: If you've refrigerated the dough for fermentation, allow it to warm to room temperature before shaping. This makes it easier to work with and helps achieve the best texture in your final rolls.
- Grease 2 muffin pans and set aside.
- Lightly flour your hands and work surface. Fold the dough over itself 5-6 times to build structure and create a firmer shape.
- Using a bench scraper, cut the dough into smaller pieces. For evenly sized rolls, weigh each piece to be 23-26 grams.
- To shape each piece into a ball, lightly dust it with flour. Fold the edges toward the center, creating a smooth, taut surface on top. Finally, pinch and twist the bottom to seal it.
- Place 3 dough balls seam side down into each cup.
Final Proof (Second Rise)
- Cover the pan with greased plastic wrap and let the rolls proof until they have expanded and filled in any gaps in the muffin cups. This may take 1-2 hours, depending on the temperature of your kitchen. See Note #4 below
Baking the Rolls
- About 30 minutes before baking, preheat your oven to 375°F (190°C). See Note #5 below
- Bake the rolls for 25 minutes, or until they turn a rich golden brown.
- For an extra touch of richness, add a dab of butter on top of each roll while they're still hot.