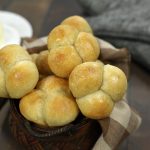
Sourdough Cloverleaf Rolls
Soft, chewy, and irresistibly tangy, these Sourdough Cloverleaf Rolls are pure perfection. Made with my Easy Sourdough Starter, this recipe is broken down into simple steps, making it approachable for beginners while delivering bakery-quality results.
Servings 14 Rolls
Calories 167kcal
Ingredients
- 150 grams Easy Sourdough Starter *bubbly and active
- 20 grams granulated sugar
- 325 grams warm water *105℉ to 115℉ (40°C to 46°C)
- 500 grams all purpose flour *unbleached, See Note #1 below
- 15 grams salt
- 35 grams oil *avocado or olive oil
Instructions
Mixing the Dough
- In a large bowl, weigh and combine the sourdough starter, sugar, and warm water. Stir until the starter is mostly dissolved. Note: Be sure to tare your scale before weighing each ingredient so you get accurate measurements. See Note #2 below
- Add the flour and salt, then mix with a wooden spoon or your hand until most of the flour is incorporated.
- Add the oil and continue mixing until a rough, shaggy dough forms. Cover the bowl with lightly greased plastic wrap and let it rest at room temperature for 45 minutes. See Note #3 below
Stretch and Fold
- After the dough has rested, take one side and gently stretch it upward, then fold it over the center. Turn the bowl slightly and repeat, working your way around the dough for about one minute.
- Cover the bowl again and let the dough rest for 30 minutes. Repeat this stretch, fold, and rest process a total of four times. This helps build strength in the dough and improves the texture of the rolls.
First Fermentation (Bulk Rise)
- Once the last stretch and fold is finished, let the dough rest and rise. You can either keep it at room temperature for about 4 hours (depending on ambient temperature) until it looks noticeably puffed up, or refrigerate it for up to 12 hours if you want to bake later.
Shaping the Rolls
- Note: If you've refrigerated the dough for fermentation, allow it to warm to room temperature before shaping. This makes it easier to work with and helps achieve the best texture in your final rolls.
- Grease 2 muffin pans and set aside.
- Lightly flour your hands and work surface. Fold the dough over itself 5-6 times to build structure and create a firmer shape.
- Using a bench scraper, cut the dough into smaller pieces. For evenly sized rolls, weigh each piece to be 23-26 grams.
- To shape each piece into a ball, lightly dust it with flour. Fold the edges toward the center, creating a smooth, taut surface on top. Finally, pinch and twist the bottom to seal it.
- Place 3 dough balls seam side down into each cup.
Final Proof (Second Rise)
- Cover the pan with greased plastic wrap and let the rolls proof until they have expanded and filled in any gaps in the muffin cups. This may take 1-2 hours, depending on the temperature of your kitchen. See Note #4 below
Baking the Rolls
- About 30 minutes before baking, preheat your oven to 375°F (190°C). See Note #5 below
- Bake the rolls for 25 minutes, or until they turn a rich golden brown.
- For an extra touch of richness, add a dab of butter on top of each roll while they're still hot.
Notes
Note #1- This recipe uses all-purpose flour for a soft, tender texture, but you can experiment with other flours. Bread flour will create a slightly chewier roll, while whole wheat adds a heartier flavor. If using whole wheat, replace up to one-fourth of the total flour with it to keep the dough light.
For the best results in sourdough baking, I always trust King Arthur flour—never bleached, reliably high-quality, and sourced with care. Plus, ordering directly ensures you get the freshest flour, not one that's been sitting in a warehouse.
Note#2- "Tare the scale" means resetting a digital or mechanical scale to zero after placing a container or ingredient on it. This allows you to measure only the weight of what you're adding without including the weight of the container.
Note #3- Fermentolyse is the first resting stage with these rolls where flour, water, and sourdough starter are mixed and left to rest. During this time, the flour absorbs water, gluten begins to form, and fermentation starts. This simple step makes the dough easier to handle and helps create a soft, airy texture.
Note #4- Proofing time can vary based on room temperature and the strength of your starter, so rely on visual and tactile cues rather than the clock. The dough should rise noticeably and have a slight jiggle when gently shaken. To test readiness, press your fingertip lightly into the dough. If the indentation springs back slowly and leaves a slight impression, it's ready to bake. If it bounces back too quickly, it needs more time. If it collapses or doesn’t spring back at all, it may be over-proofed.
Note #5- A fully preheated oven is key to great oven spring, helping the dough expand rapidly for a light, airy texture. The sudden blast of heat encourages a quick rise before the crust sets, resulting in better volume and structure. For the best results, preheat your oven for at least 30 minutes before baking.
Nutrition
Calories: 167kcal | Carbohydrates: 31g | Protein: 4g | Fat: 3g | Saturated Fat: 0.2g | Polyunsaturated Fat: 1g | Monounsaturated Fat: 2g | Trans Fat: 0.01g | Sodium: 417mg | Potassium: 38mg | Fiber: 1g | Sugar: 2g | Vitamin A: 1IU | Calcium: 6mg | Iron: 2mg